Key takeaways
- If your gaming PC will not turn on, nine times out of ten the culprit is power reaching the board: a wall socket, a flicked PSU switch, a loose 24-pin or 8-pin cable, or a tired power supply.
- Work through it in order: wall and socket first, then the PSU switch, then the front-panel power button, then the big power connectors, then the RAM and graphics card.
- A quick PSU jump test (the paperclip test) tells you whether the power supply itself is alive before you buy anything.
- "No power" (nothing at all), "no post" (fans spin but nothing boots) and "no display" (fans and lights but a black screen) are three different faults with three different fixes.
- Most no-power faults come down to one part. We diagnose the dead part and replace it. We do not carry out any board-level or soldering repairs.
- If you are anywhere in Greater Manchester, we collect, diagnose and return for free, so you never have to guess.
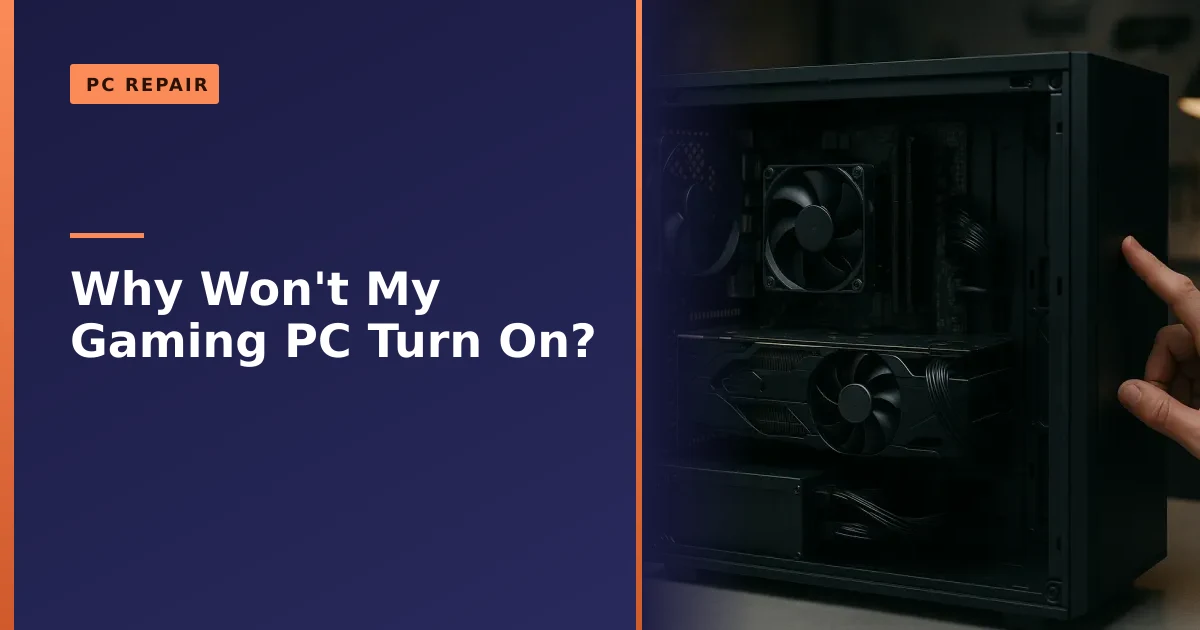
If your gaming PC will not turn on, start with the boring things first, because they fix most cases: check the wall socket works, make sure the switch on the back of the power supply is set to on, and press the power button firmly. If there is still no life, the most likely faults are a loose 24-pin power cable, a failed power supply, or a stuck front-panel power button, and every one of those is fixable.
A dead gaming PC is stressful, especially when it was fine yesterday. The good news is that a machine showing no sign of life is usually easier to diagnose than one that boots then crashes. Only a handful of things can stop power reaching the motherboard, and you can rule most of them out at your desk in twenty minutes without special tools. This guide walks you through the safe checks in the right order, explains what each result means, and is honest about the point where it makes sense to hand it to our PC repair service in Manchester rather than keep poking around inside a live machine.
First, work out what "won't turn on" actually means
"It won't turn on" describes three completely different faults, and telling them apart is the single most useful thing you can do before you touch a screwdriver. Watch and listen carefully when you press the power button, then match what you see to one of these:
- No power at all. You press the button and nothing happens. No fans spin, no lights, no beep, no whir. The machine is as dead as an unplugged kettle. This points squarely at the mains supply, the power supply unit (PSU), the power button, or the 24-pin connector.
- Power but no post. Fans spin, lights come on, maybe the graphics card fans twitch, but the machine never gets as far as showing anything or loading Windows. It might power up for a second and shut straight back down, or sit there whirring with a black screen. This is a "no post" fault, and post stands for the power-on self-test that a healthy PC runs the instant it wakes up. Usual suspects: RAM, graphics card, or the CMOS settings.
- Power and post but no display. Everything sounds like it is booting normally, fans settle down, but the monitor stays black. That is usually a display, cable, or graphics card problem rather than a power problem, and we cover it in detail in our guide to a PC that turns on but shows no display.
This guide focuses on the first two: genuinely no power, and power with no post. If your fans and lights are coming on but the screen is dark, jump straight to that display guide, because you will be chasing the wrong fault here. If your machine powers on fine but then reboots or freezes once you are gaming, that is a different animal again and our article on random PC crashes and restarts is the right place to look.
Start at the wall: mains, sockets and surges
It sounds obvious, and that is exactly why people skip it. A surprising share of "dead" PCs we collect turn out to have a fault somewhere between the wall and the case, not inside it. Before you open anything, run these checks:
- Test the socket. Plug a lamp or phone charger into the same wall socket. If that does not work either, the socket, plug fuse, or extension lead is your problem, not the PC.
- Bypass the surge protector. Many surge strips have their own switch and fuse, and some trip after a power cut or a spike. Plug the PC straight into the wall to test.
- Swap the kettle lead. The cable from the PSU to the wall is a standard IEC C13 ("kettle") lead, and they do fail if trodden on or chewed. Swap in a spare from another appliance if you have one.
- Check the plug fuse. UK plugs have a fuse inside. A blown fuse after a surge leaves the PC completely dead, and swapping it takes thirty seconds.
- Think about recent events. A thunderstorm, power cut, or tripped consumer unit can take out a PSU or its fuse without leaving a mark. It is one of the most common reasons a machine that was fine yesterday is dead this morning.
If the socket is live, the lead is good, and the plug fuse is intact, the fault is now almost certainly inside the case. Time to open it up.
The PSU switch, and the two-second discharge trick
The power supply is the metal box, usually at the top or bottom rear of the case, where the mains cable plugs in. It has a small rocker switch next to that socket, marked with a circle and a line (O for off, I for on). It is remarkably easy for that switch to get knocked to off when you move the case, dust behind the desk, or plug something in round the back.
- Make sure the mains cable is firmly seated in the PSU and the switch is set to on (the I side pressed in).
- If it was already on, try a full discharge. Switch the PSU off at that rocker, unplug the mains cable, then hold the case power button down for about ten seconds. This drains the residual charge held in the board and PSU capacitors and clears a surprising number of "stuck" states.
- Plug back in, flick the PSU switch to on, and try the power button again.
This little routine is worth doing early because it costs nothing and genuinely revives machines that got confused after a power cut or an unclean shutdown. Modern ATX power supplies keep a trickle of standby voltage running even when the PC looks off, which is how features like wake-on-LAN work, and that standby rail can sometimes latch into a fault state until it is fully drained. If you want the technical detail, the ATX PSU standard is a decent primer. If the discharge brings it back to life, great. If not, keep going.
Is it the power button? Check the front-panel header
The button on the front of your case does not switch any real power itself. It is just a tiny switch on the end of a thin two-wire cable that runs to a block of pins on the motherboard called the front-panel header, usually tucked in the bottom-right corner of the board. That cable is easy to knock loose when you add a drive or tidy your cabling, and the button itself can wear out or stick.
Here is how to test whether the button, rather than anything expensive, is the problem. With the case open and the PSU switched on:
- Find the front-panel header and the two pins labelled PWR SW, POWER SW or PW. Your motherboard manual shows the exact layout, and the labels are usually printed tiny on the board itself.
- Check the little connector for those two pins is pushed fully home and has not half pulled off or gone dusty. Reseat it firmly.
- If it looks fine and the PC still will not start, briefly touch the two PWR SW pins at the same time with the tip of a flat screwdriver. This does exactly what the button does, just more directly.
If the machine springs to life when you bridge those two pins but not when you press the case button, then the button or its cable is faulty, and the rest of the PC is fine. That is a cheap, easy fix. If nothing happens when you bridge the pins either, the button is off the hook and the fault is further in, most likely the PSU or the main power connectors.
Check the big power connectors: 24-pin, EPS and PCIe
A gaming PC has several fat power cables running from the PSU into the machine, and if any of the important ones is loose, the PC will refuse to start or will start and shut straight down. Vibration, a house move, or a recent upgrade can all leave a connector sitting slightly proud without you noticing. Push each of these firmly back in until it clicks:
- The 24-pin motherboard connector. This is the big rectangular block that powers the board. It is the single most common loose connector we find on "dead" builds. Unclip it, pull it out, and push it fully back in until the latch snaps.
- The 8-pin (or 4+4) EPS/CPU connector. This sits at the top of the board near the processor and powers the CPU. A PC with the 24-pin in but the CPU connector loose or missing will typically do nothing, or spin fans for a second and stop. It is easy to forget after a cooler swap.
- The PCIe power cables to the graphics card. Modern gaming cards draw big power through one, two, or three 6+2 pin cables, or a single 12-pin/12VHPWR connector on the newest cards. If a card is not getting its power, some systems will not post at all, and many will beep or flash a warning light. Make sure each PCIe cable is fully seated at both ends.
A quick word of honesty here: if a connector has visibly melted, scorched, or discoloured (this occasionally happens with high-power graphics connectors that were not clicked fully home), do not keep using it. That is a job to bring in. We diagnose the damage and replace the faulty cable, the PSU, or the affected part. We do not carry out any board-level or soldering repairs, so if a connector on the board itself is damaged we will tell you honestly and advise the best route, whether that is a replacement part or the whole board.
The PSU test: is the power supply actually dead?
If you have power at the wall, a good lead, the switch on, and the big connectors seated, and the machine is still lifeless, the power supply itself is the prime suspect. A failing PSU is one of the most common reasons a desktop simply will not wake up, and the symptoms are covered in more depth in our guide to the signs of a failing PSU. There are two safe ways to check it at home.
The paperclip test (PSU jump test). This tricks the power supply into turning on by itself, so you can see whether it is alive without the rest of the PC. Done carefully it is safe, but read the safety notes below first.
- Switch off the PSU and unplug it from the wall. Disconnect every cable from the motherboard, drives and graphics card, so the PSU is completely isolated from the rest of the PC.
- On the main 24-pin connector, find the single green wire. Straighten a paperclip and push one end into the green wire's pin and the other end into any one of the neighbouring black (ground) pins.
- Plug the PSU back into the wall and flick its switch to on. If the PSU fan spins up, the unit will at least power on. If nothing happens at all, the PSU is almost certainly dead.
Safety, plainly stated. Never open the power supply casing itself. The capacitors inside can hold a dangerous charge long after it is unplugged, and there is nothing user-serviceable in there. While the paperclip is in place and the PSU is plugged in, do not let the metal touch anything except those two pins, and keep your fingers well clear. If you are not comfortable doing this, do not. It is exactly the sort of quick check we do as part of a diagnosis.
One important limit: the paperclip test only proves the PSU can switch on. It does not prove the PSU is delivering clean, stable voltage under load. A power supply can pass the paperclip test and still be the reason your PC crashes when a game loads, because it sags under demand. That is why the definitive test is swapping in a known-good PSU of the right wattage, which is one of the first things we do in the workshop.
What the fans and lights are telling you
- Nothing at all, ever: mains, plug fuse, PSU switch, PSU, or the 24-pin. Start at the wall and work in.
- Fans twitch for one second then stop: classic sign of a loose CPU (EPS) connector, a short, or a struggling PSU.
- Fans spin steadily but no beep and no picture: a "no post" fault. Suspect RAM or graphics card first.
- A pattern of beeps or a lit diagnostic LED: the board is talking to you. Note the pattern or the labelled LED (CPU, DRAM, VGA, BOOT) and check the manual.
- Everything runs but the screen stays black: not a power fault. See our no-display guide.
Reseat the RAM and the graphics card
If the fans and lights come on but the machine never posts, the two parts most likely to be the cause are the memory and the graphics card. Both can work themselves slightly loose over time or after a knock, and a stick of RAM that is a fraction proud of its slot will stop a PC posting stone dead. Reseating is the single most effective no-post fix there is.
- RAM. Power the machine down fully (PSU switch off, mains out). Open the clips at each end of the memory slots, lift the sticks out, and check the gold contacts are clean. Push each stick back in firmly and evenly until both clips snap up on their own. If you have more than one stick, try booting with just one, in the slot nearest the CPU (the manual names it, often A2 or DIMM2), then swap sticks and slots to find a bad module or a bad slot.
- Graphics card. Release the catch at the end of the PCIe slot, ease the card out, and reseat it firmly until it clicks. Make sure its power cables are connected. If the PC posts with the card removed and using onboard video (if your CPU has it), the card or its power feed is the issue. If your CPU has no onboard graphics, a dead or unseated card can be exactly why nothing appears.
Handle everything by the edges, and it is worth touching a bare metal part of the case first to discharge any static from your hands. Reseating costs nothing and fixes a large share of no-post machines. If it works, wonderful. If a stick or the card turns out to be faulty, that is a straightforward part replacement.
Clear the CMOS and try a bare-bones boot
Sometimes a PC will not post because its stored settings have got into a tangle, often after a failed update, a dead backup battery, or an overclock that did not hold. Clearing the CMOS resets the board's firmware settings back to default and is a safe, standard step.
- With the machine off and unplugged, find the small, shiny, coin-shaped battery (a CR2032) on the motherboard. Gently pop it out, wait five minutes, then put it back the same way up. Many boards also have a pair of pins or a button marked CLR_CMOS or CLEAR that does the same job.
- A CR2032 that is flat can, on its own, stop some machines booting or make them lose the time and settings every power cut. They are a couple of pounds and easy to replace.
If it still will not post, strip the machine back to the bare minimum and try again. Disconnect the storage drives, remove all but one stick of RAM, unplug any extra USB and case wiring, and, if your CPU has onboard graphics, take the graphics card out too. You are left with the board, CPU and cooler, one stick of RAM and the PSU. If it posts like that, add parts back one at a time until the culprit reveals itself. This minimal-boot method is exactly how we isolate a fault in the workshop, just done methodically and with spare parts to hand.
The hidden killer: a short from a loose standoff or screw
One fault that catches a lot of home builders out is an electrical short between the motherboard and the metal case. The board is meant to sit on small brass pillars called standoffs, which hold it clear of the metal tray. If a standoff is in the wrong place, or a loose screw or offcut of metal has fallen behind the board, it can short a contact and cause the classic symptom: the PC starts for a fraction of a second and immediately shuts down, over and over, or does nothing at all.
- If your PC does the "one-second start then dead" loop, and the CPU connector is definitely seated, suspect a short.
- Check that every standoff lines up with an actual screw hole in the board, and that there is not a spare one hiding under it in a spot with no matching hole.
- Give the case a gentle look for stray screws or metal debris resting on or behind the board.
Shorts are fiddly to chase because they can hide behind a fully built machine, and it often means lifting the board out to inspect the tray underneath. This is a common point where it makes more sense to bring the machine in than to dismantle a whole build on the kitchen table.
A quick decision table: match your symptom to the likely cause
Use this to work out where you are and what to check next. Work down the list in order, because the earlier rows are cheaper and quicker to rule out.
| What you see | Most likely cause | What to try / bring in |
|---|---|---|
| Utterly dead, no lights or fans, nothing on any device from that socket | Wall socket, plug fuse, or extension lead | Test the socket with a lamp, check the plug fuse, bypass the surge strip |
| Dead PC but the socket is fine | PSU switch off, bad kettle lead, or failed PSU | Check the PSU switch, swap the lead, do the paperclip test |
| Nothing when you press the case button, but it starts when you bridge the PWR pins | Faulty power button or front-panel cable | Reseat the header; replace the button or cable (a cheap fix) |
| Fans spin for one second then stop, repeatedly | Loose CPU (EPS) connector, a short from a standoff, or a weak PSU | Reseat the 8-pin CPU cable; check for shorts; bring in if it persists |
| Fans and lights on, no beep, black screen, never posts | Unseated or faulty RAM, or graphics card | Reseat the RAM and GPU, try one stick, clear the CMOS |
| Everything runs, fans settle, but the monitor stays black | Display, cable, or graphics output (not a power fault) | See our "turns on but no display" guide |
| Starts fine, then shuts off or reboots once you load a game | PSU sagging under load, or overheating | See our guide to random crashes and restarts |
| Burnt smell, buzzing, scorched connector, or a bulging PSU | Failed or failing power supply | Stop using it and bring it in for a PSU replacement |
When to stop and bring it in
Plenty of no-power faults are a genuine ten-minute fix once you know where to look, and this guide covers the safe ones. But there is a sensible line, and it is worth respecting for the sake of both your machine and your wallet. Bring it in, rather than push on, if any of these apply:
- You can smell burning, see scorch marks, or the PSU is buzzing, clicking or bulging. A failed power supply can take other parts with it, so stop.
- You have done the wall, lead, switch, connectors and reseat checks and it is still dead. At that point you have ruled out the easy wins and you are into swap-testing with spare parts, which is what a workshop is for.
- The machine starts for a second then dies in a loop and you cannot find a loose connector. That often means a short or a struggling PSU, and finding it can mean stripping the build.
- There is important data on the drives. If the machine will not power up and you have no backup, it is worth being cautious rather than experimental. We can recover data and set up a backup so this never bites you twice; see our data recovery service.
- You simply would rather someone who does this every day give you a straight answer. That is completely fair, and it is exactly what a diagnosis is for.
The honest promise on our side is simple: we diagnose the actual dead part and replace or upgrade it, whether that is the PSU, the RAM, the graphics card, the power button, or the whole board treated as a single part. We do not carry out any board-level or soldering repairs, and we will always tell you plainly if a machine is not worth fixing rather than sell you a repair you do not need. If you are weighing that up, our guide on whether to repair or replace a desktop PC lays out the maths, and our breakdown of what PC repair costs in Manchester means no surprises.
How Manchester PC can help
A gaming PC that will not turn on almost always comes down to one faulty part, and the hard bit is knowing which one without a bench full of spares. That is where we come in. We diagnose no-power, no-post and no-display faults every week, isolate the dead component, and put it right with a straightforward part replacement or upgrade, from PSUs and RAM to graphics cards, coolers and full rebuilds.
We offer free local collection and return across Greater Manchester, so you do not have to unplug a heavy tower and lug it anywhere. We collect it, diagnose it, tell you exactly what is wrong and what it will cost before we do anything, and bring it back working. No jargon, no pressure, and no charge for the parts of a diagnosis that turn out to be nothing.
To get started, call us on 0161 820 1992 or grab a fast, no-obligation price through our tech support quote form. Tell us what the machine does when you press the button (nothing at all, fans for a second, or fans but no picture) and we can usually give you a strong idea of the fault before we have even collected it.