Key takeaways
- If your PC powers on (fans spin, lights glow) but the monitor says "No Signal", the machine is almost always alive. The fault is usually in the display path, not the whole computer.
- The single most common cause is the monitor cable being plugged into the motherboard's video port instead of the graphics card. If you have a graphics card, the cable must go into the card.
- Work through the cheap checks first: monitor input source, a known-good cable, a second monitor, then reseat the graphics card and the RAM, then try one stick of RAM at a time.
- Listen and look for clues: beep codes and the little diagnostic lights on the motherboard tell you whether it is RAM, GPU, CPU or power.
- The honest goal is diagnose first, replace second. Once you know which part is at fault (GPU, RAM, PSU or the board), you only pay to swap the part that is actually broken.
If your PC turns on but there is no display, start here: the computer is probably fine and the problem is in the video path. Check the monitor is on the right input, make sure the cable is in the graphics card and not the motherboard, then reseat the card and RAM. Most "No Signal" faults are found in ten minutes.
A blank screen with the fans whirring is one of the most alarming things a desktop can do, and one of the most misleading. It looks like a dead PC. Nine times out of ten it is a small, fixable issue standing between you and your desktop. This guide walks you through the same ordered checks a workshop uses, from the thirty second fixes to the point where a part genuinely needs replacing. If you would rather not open the case at all, our gaming PC repair service in Manchester can diagnose a no-signal fault and tell you exactly which part is at fault before any money changes hands.
First, what "no display" actually means
"No display" covers a few different situations, and telling them apart saves you a lot of guessing. The screen might be completely black with a "No Signal", "Check Cable" or "No Input" message floating around. It might flash on for a second at power-up and then die. It might show the manufacturer logo and then go blank. Each of these points in a slightly different direction.
- Power on, no signal at all. Fans and lights come on, but the monitor never receives anything. This is the classic case in this guide, and it is usually a display-path or POST problem.
- Brief flash then nothing. The monitor briefly detects a signal, then loses it. Often a GPU that starts but fails, a driver issue, or a display going to sleep because the PC has crashed after POST.
- Logo appears, then black. The PC is posting fine. The video hardware is working. The problem is now in Windows, the drivers or the boot drive rather than the screen path.
The word to know is POST, which stands for Power-On Self-Test. It is the quick hardware check the motherboard runs the instant you press the power button, before Windows loads. If POST fails, you get no picture and often a beep or a warning light instead. You can read a plain-English explanation of POST and its beep codes on Wikipedia's Power-on self-test page. Understanding whether your PC is getting through POST is the single biggest clue to what is wrong.
The five-minute checks before you open the case
Do not reach for a screwdriver yet. A surprising number of "dead" PCs are fixed without ever opening the case. Work through these in order, and try the monitor after each one.
- Check the monitor input source. Modern monitors have several inputs (HDMI 1, HDMI 2, DisplayPort, USB-C). If the monitor is set to the wrong input, it will show "No Signal" even when the PC is working perfectly. Press the monitor's Source or Input button and cycle through every option.
- Confirm the monitor itself has power and works. Its power light should be on. If you can, plug the monitor into a laptop or another device to prove the screen is alive. A dead monitor looks exactly like a dead PC.
- Reseat the video cable at both ends. Push the HDMI or DisplayPort connector firmly into both the PC and the monitor. DisplayPort has a small locking clip that can catch. A half-seated cable is a classic cause of no signal or a picture that drops out.
- Swap the cable. Video cables fail more often than people think, especially cheap HDMI leads that have been bent behind a desk. Try a different, known-good cable.
- Try a different monitor or a TV. This is the external monitor test. If a second screen shows a picture, your original monitor or its cable was the problem, not the PC.
- Remove other displays. If you run two monitors, unplug the second one for now. Windows can sometimes send the picture to a screen that is switched off.
If you have tried every input, a second cable and a second screen and you still have nothing, the display itself is cleared and the problem is inside the PC. Now it is worth opening the case.
Motherboard port versus graphics card port: the most common mistake
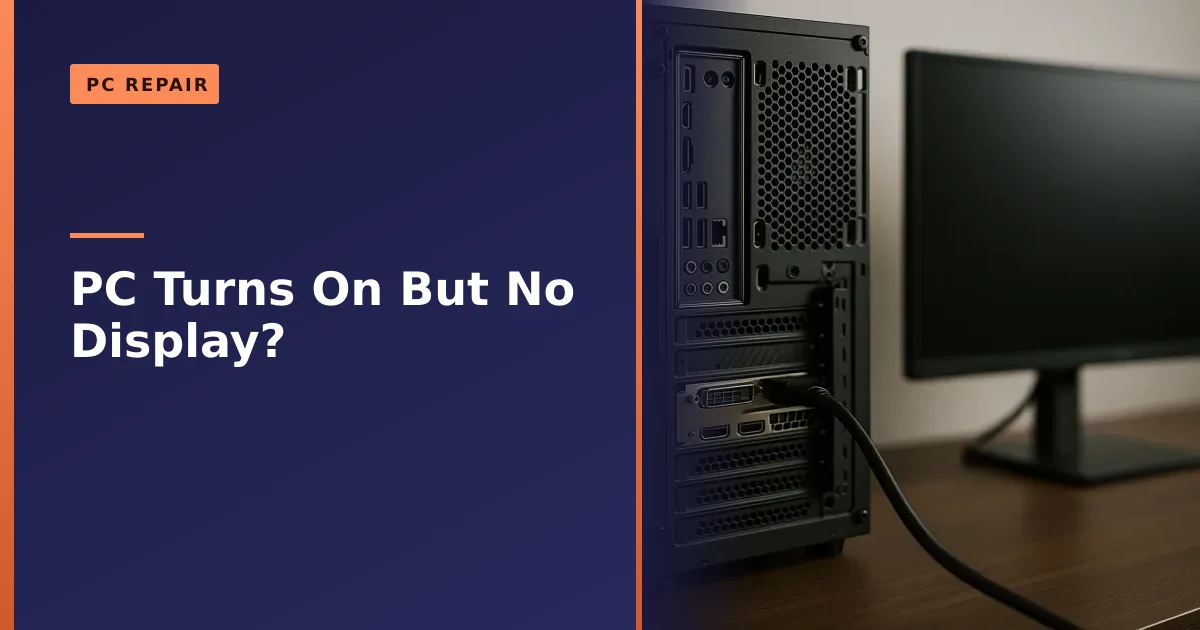
This one causes more panic than any other, and it is completely harmless once you understand it. Look at the back of your desktop. Near the top you will see the motherboard's input and output panel, which often includes video ports (HDMI, DisplayPort, sometimes DVI or VGA). Lower down, sitting horizontally in an expansion slot, is your graphics card, which has its own set of video ports.
Here is the rule: if your PC has a dedicated graphics card, the monitor cable must plug into the graphics card, not the motherboard. On most gaming and custom desktops, plugging into the motherboard's ports gives you no picture at all, because the motherboard's video outputs are disabled the moment a graphics card is fitted, or because the processor has no built-in graphics to drive them.
This trips people up constantly after they move house, after a clean, or after someone else has been behind the desk. The cable ends up in the top set of ports because they are easier to reach, and the screen stays black. If you are seeing no signal, physically trace the cable and make sure it goes into the lower ports on the graphics card. If you are not sure which is which, the graphics card ports are usually grouped together on a separate metal bracket below the main cluster of USB and network ports.
Quick rule of thumb
- Graphics card fitted? Cable goes in the card (lower ports).
- No graphics card, using the processor's built-in graphics? Cable goes in the motherboard (upper ports).
- Getting nothing from the card but a picture from the motherboard? The card may be failing, badly seated, or missing its power cable. That is a real clue, not a dead end.
Onboard versus discrete graphics: how to tell what you have
To know which port to use, you need to know whether your PC even has onboard graphics to fall back on. There are two sources of video in a desktop:
- Onboard (integrated) graphics. Built into the processor itself. It drives the motherboard's video ports. Many Intel processors include it. Many AMD processors, and most higher-end gaming chips, do not, which is why their motherboards give no picture without a graphics card.
- Discrete (dedicated) graphics. A separate graphics card in a PCIe slot, with its own cooling and often its own power cables. This is what drives games and what most desktops rely on for the display.
Why this matters: if your processor has integrated graphics, you can pull the graphics card out entirely and plug the monitor into the motherboard to test. If you then get a picture, you have proven the rest of the PC works and pointed the finger straight at the graphics card. If your processor has no integrated graphics, this test is not available and the motherboard ports will stay dark no matter what. If you are unsure, the model number of your processor tells you; a quick search of the exact chip name will say whether it has integrated graphics.
Reseat the graphics card and the RAM
If the display is cleared and the cable is in the right port, the next job is to make sure the two components most likely to cause a blank screen are properly connected. Over time, heat cycles and the weight of a big cooler can let a card or a memory stick creep slightly loose in its slot, and even a fraction of a millimetre is enough to stop a picture.
Before you touch anything inside the case, shut the PC down fully, switch off the power supply at the socket, and hold the power button for a few seconds to drain any residual charge. Touch a bare metal part of the case to discharge static from yourself before handling parts.
- Reseat the graphics card. Release the small retention clip at the end of the PCIe slot, unscrew the card's bracket, lift it straight out, then push it firmly back down until the clip clicks. Make sure any 6-pin or 8-pin power cables from the power supply are fully clicked into the top or end of the card. A card that is starved of power will spin its fans but give no display.
- Reseat the RAM. Open the clips at each end of every memory stick, take each one out, and press it firmly back in until both clips snap closed on their own. Memory needs a proper amount of pressure to seat; a stick that looks in can still be making a poor contact. Manufacturers such as Crucial note that reseating memory clears a large share of no-boot faults, and their memory installation troubleshooting guide covers the correct technique.
Reconnect the monitor and try again. Reseating alone fixes a genuine slice of no-signal cases, because the fault was never a broken part, just a loose connection.
The single-stick RAM test
Bad or badly seated memory is one of the top causes of a PC that powers on but never puts a picture on the screen. If you have more than one stick of RAM, this test isolates the problem quickly and costs nothing.
- Power down and remove all but one stick of RAM.
- Put that single stick into the slot the motherboard manual recommends for one stick (often the second slot along from the processor, but check the printing on the board or the manual).
- Power on and watch the screen.
- If you get a picture, great. Power down, add the next stick, and test again. Keep going until either everything is back in or the screen goes blank again.
- If a particular stick or a particular slot always kills the display, you have found your culprit.
This tells you three useful things: whether the RAM is the fault at all, which stick is bad if it is, and whether a memory slot on the board has failed. A single working stick is enough to get into Windows, so you can keep using the PC on one stick while a replacement pair is sorted.
Clear the CMOS
The CMOS holds your motherboard's BIOS settings. If a bad setting, a failed overclock or a corrupted update is stopping the board from posting, clearing the CMOS resets everything to safe defaults and can bring the display straight back. It is a safe, standard step and it changes nothing about your files or Windows.
There are three common ways to clear it, in order of ease:
- Clear CMOS button. Many modern gaming motherboards have a small button on the rear input and output panel labelled "Clear CMOS" or "CLR CMOS". With the PC off at the wall, press and hold it for a few seconds.
- The jumper. A two or three-pin header on the board, usually labelled CLR CMOS or JBAT. With the power off, move the jumper across for a few seconds and back, following the motherboard manual.
- The coin cell battery. Remove the flat, silver CR2032 battery from the board, wait a minute or so, then refit it. This drains the settings the slow way.
After clearing, the first boot may be slow and the clock will be wrong, which is completely normal. If the display returns, you have your answer. If the fault came from a recent BIOS change or overclock, this is often all it takes. If you have been thinking about a BIOS update as part of this, it is worth reading up on whether you actually need to update the motherboard BIOS before you do, because a failed update can cause the very problem you are trying to fix.
Listen and look: beep codes and debug lights
When a PC cannot show a picture, the motherboard tries to tell you what is wrong in other ways. Learn to read these and you can often name the faulty part without any picture at all.
- Beep codes. If your case or board has a small internal speaker, POST failures produce a pattern of beeps. As a rough guide across common boards, one short beep usually means all is well, repeated or continuous beeps often point to RAM not being detected, and a long-long-short type pattern frequently points at the graphics card. Because the exact meaning varies by manufacturer, check your motherboard manual for the precise chart. The general idea is covered on the Wikipedia POST page.
- Debug LEDs. Many gaming motherboards have four little labelled lights near the edge: CPU, DRAM, VGA and BOOT. During a normal start they light in turn and go out. If one stays lit, that is the stage that failed. A stuck DRAM light means memory, a stuck VGA light means graphics, a stuck CPU light means processor or its power, and a stuck BOOT light means the storage or the operating system.
- A two-digit code display. Higher-end boards show a two-character code. Look it up in the manual to see exactly where the boot stalled.
These indicators turn guesswork into a proper diagnosis. If the DRAM light is stuck on, you know to focus on the single-stick RAM test. If the VGA light is stuck on, the graphics card is the prime suspect. This is exactly the diagnose-first approach that stops you replacing parts that are perfectly fine.
Is it a failing graphics card or a failing power supply?
Once the easy checks are done and the fault is clearly inside the PC, it usually narrows to one of two components: the graphics card or the power supply. Telling them apart matters, because they cost very different amounts to replace and behave in similar ways at power-up.
A failing graphics card often shows itself like this: the PC posts and works with the motherboard's onboard video (if you have it) but gives nothing from the card, or it gave artefacts, coloured speckles and crashes in games before it went dark. Cards can degrade after years of heat. If pulling the card and using onboard graphics restores a picture, the card is the likely fault. Our graphics card upgrade guide for Manchester walks through choosing a suitable replacement and making sure your power supply and case can take it.
A failing power supply is sneakier. A PSU that is on its way out can deliver just enough to spin fans and light the board, but not enough clean, stable power under load to drive the graphics card or complete POST. The classic signs are a PC that only fails once the graphics card is fitted, random shutdowns, or a machine that will not power on consistently. Because a weak PSU can mimic a dead GPU, it is worth knowing the wider signs that a PSU is failing before you spend money on the wrong part. The only reliable way to confirm a PSU is to test with a known-good unit, which is a common workshop step.
If none of this points anywhere and the machine will not even begin to post, the fault may sit with the processor or the board itself. In that case the sensible move is a proper diagnosis rather than buying parts on a hunch. Our sibling guide on why your gaming PC will not turn on covers the no-power side of the picture in detail and pairs well with this one.
A quick decision table
Use this to match what your PC is doing to the most likely cause and the sensible next step.
| What you see or hear | Most likely cause | Sensible next step |
|---|---|---|
| "No Signal", fans spinning, cable in motherboard ports | Cable in the wrong port | Move the cable to the graphics card |
| No picture on any input, but a second monitor works | Monitor or original cable | Replace the cable or the monitor |
| Continuous or repeated beeps, DRAM light stuck on | RAM not detected | Reseat RAM, run the single-stick test |
| Long-long-short beeps, VGA light stuck on | Graphics card not detected | Reseat the card, check its power cables |
| Onboard video works, graphics card gives nothing | Failing or unpowered graphics card | Check power cables, then test or replace the card |
| Only fails once the graphics card is fitted, random shutdowns | Power supply too weak or failing | Test with a known-good PSU |
| No beeps, no lights, no picture at all | Power, board or processor | Clear CMOS, then seek a diagnosis |
| Logo shows then black screen | Windows, drivers or boot drive | Boot to safe mode, check the drive |
When to stop and bring it in
Home checks solve a lot of no-signal faults, and there is no shame in stopping once you have run out of safe, obvious steps. It is time to hand it over when:
- You have swapped cables, tried a second monitor, confirmed the cable is in the graphics card, reseated the card and RAM, run the single-stick test and cleared the CMOS, and the screen is still black.
- A debug light or beep code points at the CPU or the board, which are not parts to poke at blindly.
- You suspect the power supply but have no known-good unit to test with.
- You are not comfortable working inside the case, or the PC is still under a warranty you do not want to void.
At that point a workshop earns its keep by testing with known-good parts, so the diagnosis is proven rather than guessed. The honest approach we take is diagnose first, then replace only the part that is actually at fault, whether that is the graphics card, the memory, the power supply or the whole board fitted as a part. To be completely straight with you, we do not carry out board-level or soldering repairs; we replace the faulty part or the whole board, or advise you on the best route, so you never pay for work that will not last. This is exactly how a recent no-signal job played out, described in our write-up of a custom build "No Signal" repair in Salford, where the fault was traced to a single component rather than the expensive one everyone assumes.
Working out whether a fix is worth it also comes down to cost, and being able to point to the exact faulty part keeps that cost honest. If you want a feel for typical pricing before you commit, see our guide to how much PC repair costs in Manchester.
How Manchester PC can help
If your desktop or gaming PC powers on but stays stubbornly blank, we will find the real cause and tell you what it will take to fix it before any work starts. We diagnose the whole display path, from cable and monitor to graphics card, memory, power supply and board, using known-good parts so the answer is proven, not guessed. Then we replace or upgrade only what is genuinely faulty.
We offer free local collection and return across Manchester, so you do not have to lug a heavy tower anywhere. Call us on 0161 820 1992 to talk it through, or request a no-obligation tech support quote and we will get your screen lit up again. If you have been weighing up an upgrade at the same time, we can advise on that too, whether it is more memory or a better graphics card, so the machine comes back stronger than it went in.