Key takeaways
- Start with your budget and what the PC is actually for. A gaming rig, a work machine and a home PC have very different priorities.
- The one compatibility check you cannot get wrong is the CPU and motherboard socket. Match them, and the right chipset and RAM type (DDR4 or DDR5) follow.
- Do not skimp on the power supply. A quality, properly rated PSU protects every other component, which is exactly where cheap prebuilts cut corners.
- Balance the CPU and graphics card to your use, plan for cooling and case clearance, and leave some headroom for future upgrades.
- Plan the order of assembly before you start, and budget time for a fiddly first boot. A new build that does not POST first time is normal, not a disaster.
- If a self-build feels daunting, a custom build or upgrade from us gets you the right parts, properly assembled, with a real warranty and local support.
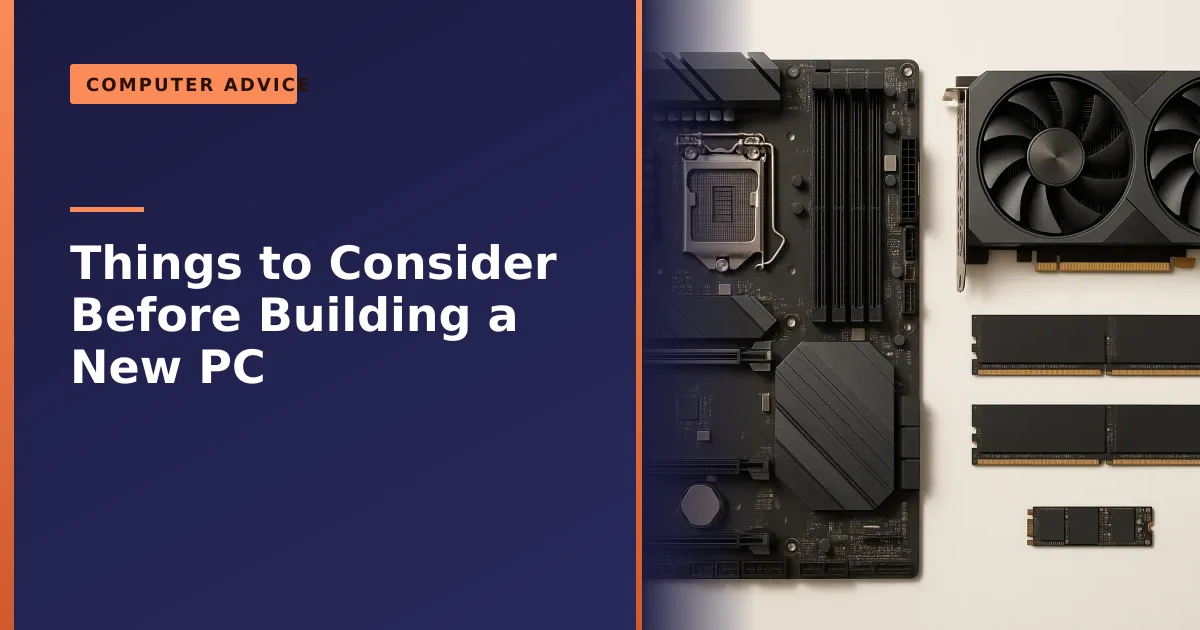
Building a new PC is hugely rewarding, but a good build starts long before you pick up a screwdriver. Get a few key decisions right at the planning stage, your budget, what the machine is for, and how the core parts fit and balance together, and the build itself is straightforward. Get them wrong, and you can end up with parts that do not fit, a bottlenecked system, or a cheap power supply that puts everything else at risk. This guide walks through what to consider before you buy a single component.
We build custom PCs and upgrade machines for customers across Manchester, so this is the practical planning advice we use ourselves, whether you are building it yourself or having us do it for you. We have kept it current for 2026, when the choices are AMD Ryzen versus Intel Core Ultra on the processor side, Nvidia's RTX 50 series on graphics, DDR5 memory as standard, and PCIe Gen4 or Gen5 NVMe storage.
Start with the budget and the purpose
Before looking at any specific parts, answer two questions: how much do you want to spend, and what will the PC mainly be used for? These two answers shape every decision that follows, because the right build for gaming is very different from the right build for office work, video editing or a simple family computer.
A gaming PC puts most of the budget into the graphics card. A workstation for video or 3D leans on the processor, memory and fast storage. A home or office machine needs none of that expense and is better spent on a good SSD and enough memory for smooth everyday use. Being honest about what you actually need stops you overspending on power you will never use, or underspending on the parts that matter. Set the budget and the purpose first, and let them guide the rest. The table below shows where the money should typically go for three common types of build.
| Use case | Spend most on | Spend least on | Typical RAM |
|---|---|---|---|
| Gaming | Graphics card, then CPU | Storage capacity, fancy extras | 32GB |
| Creative workstation (video, 3D, photo) | CPU cores, RAM, fast storage | Flagship gaming GPU (unless GPU rendering) | 32GB to 64GB |
| Home and office | SSD and a balanced CPU | Dedicated graphics card | 16GB |
If you are still weighing whether a desktop is even the right shape of machine for you, our guide on laptop versus PC is worth a quick read before you commit. A desktop almost always gives you more performance per pound and is far easier to upgrade and repair later, which is a big part of why people choose to build.
The one check you cannot get wrong: CPU and motherboard
If there is a single critical compatibility check, it is this: your processor and motherboard must use the same socket. An AMD Ryzen chip will not physically fit an Intel board, and vice versa, and even within one brand the socket and chipset must match the exact CPU generation. Recent AMD Ryzen chips use socket AM5, while current Intel chips use LGA 1851, and they are not interchangeable.
Get this right and most other things fall into place, because the motherboard then dictates what else is supported: the type and speed of memory, the storage connections, and the expansion slots. The motherboard is the foundation everything plugs into, so choose the CPU and a compatible board together, as a pair, before anything else. A tool like PCPartPicker is invaluable here, as it automatically flags socket mismatches and other incompatibilities as you choose parts.
The chipset on the board is the next layer. On AMD's AM5 platform you will see chipsets such as B650 and B650E for mainstream builds and X670E and X870E for higher-end ones, while Intel's LGA 1851 boards run B860 for mainstream and Z890 for enthusiast use. The differences come down to how many fast PCIe lanes, USB ports and M.2 slots you get, and how robust the power delivery is for a hungry processor. For most people a good mid-range board (a B650 or B860) hits the sweet spot. There is one more reason AM5 is popular: AMD has committed to supporting the socket for several years, so a board bought today has a realistic chance of taking a future Ryzen processor, whereas Intel platform jumps have more often meant a new board as well.
Choosing your CPU: AMD Ryzen or Intel Core Ultra in 2026
In 2026 the processor decision really does come down to two camps: AMD's Ryzen 9000 family and Intel's Core Ultra 200 series. Both are excellent, and there is no longer a wrong answer, but they lean in slightly different directions, so match the chip to what you do most.
For pure gaming, AMD's X3D chips are the standout. According to Tom's Hardware, the Ryzen 7 9800X3D is the best gaming CPU purchase, and in their testing it beats Intel's previous fastest gaming chip by around 30 percent across their test suite. The reason is a clever slab of extra cache (AMD calls it 3D V-Cache) stacked onto the chip, which keeps the most-used game data close to the cores and lifts frame rates in the kind of games that live or die on responsiveness. If gaming is your main reason to build, an eight-core X3D chip is hard to beat and you usually do not need anything more expensive.
For people who edit video, render 3D, compile code or crunch through heavy multitasking, the picture is more balanced. AMD's higher core-count chips (such as the 16-core Ryzen 9 parts) and Intel's Core Ultra 7 and Core Ultra 9 are all strong, with Intel's Core Ultra line offering competitive value in mixed gaming-and-work use. The honest summary is this: if you mostly game, lean AMD X3D; if you mostly create or want one chip that does a bit of everything, compare a Ryzen 9 against a Core Ultra 7 at your budget and buy whichever is better value. Either way, do not buy more cores than your software can actually use, because many everyday tasks and games barely stretch eight good cores.
Choosing your graphics card: the RTX 50 series and how much VRAM
If you are building to game, the graphics card is the single most important decision and usually the biggest line in the budget. In 2026 the current generation is Nvidia's RTX 50 series, built on its Blackwell architecture, and it is the first consumer range to use fast GDDR7 memory. The cards scale up steeply in both performance and price.
The amount of video memory (VRAM) on the card matters more than many first-time builders expect, because it sets a ceiling on the textures and resolutions you can run smoothly. According to Wikipedia's RTX 50 series specifications, the desktop line spans 8GB on the entry-level RTX 5060, 12GB on the RTX 5070, 16GB on the RTX 5080, up to 32GB on the flagship RTX 5090. As a practical guide: for crisp 1080p gaming an 8GB to 12GB card is plenty; for 1440p aim for 12GB to 16GB; and for high-refresh 4K you want 16GB or more. Most sensible builds in 2026 land on a mid-range card paired with a 1440p monitor, a high-frame-rate experience without the eye-watering cost of the top tier.
Two practical points before you buy. First, modern graphics cards are physically large and power-hungry, so always check the card length against your case and factor its power draw into your PSU choice. Second, if the PC is for office work, web, email or light home use, you very likely do not need a dedicated graphics card at all, because many modern processors include capable integrated graphics, and skipping the card saves a large amount of money and power. Buy a graphics card because your workload needs one, not by default.
Memory: DDR4 or DDR5, and how much
Memory matters in two ways: the type and the amount. The type must match your motherboard, because DDR4 and DDR5 are not interchangeable and a board takes one or the other. Modern builds use DDR5, so check what your chosen board supports and buy to match. Both the AMD AM5 and Intel LGA 1851 platforms are DDR5 only, so if you are building fresh in 2026 the decision is effectively made for you.
On capacity, 16GB is the comfortable minimum for general use, while 32GB is the sweet spot for gaming and serious multitasking in 2026, and creative professionals may want 64GB or more. It is also worth fitting memory in matched pairs to run in dual channel, which is faster than a single stick, a detail many cheap prebuilt machines get wrong. Two 16GB sticks will almost always beat one 32GB stick for real-world performance, so buy memory in a matched kit rather than a single module. Our guide on whether more RAM helps covers how much you really need so you do not overspend.
Speed and timings matter too, but within sensible limits. On AMD's AM5 platform the well-established sweet spot is DDR5-6000 with a low-latency EXPO profile, because that speed stays in step with the chip's internal fabric and avoids latency penalties from pushing faster. Intel's platform tends to scale a little higher, with DDR5-6400 a common target. Whatever kit you buy, remember it will run at a slow default speed until you switch on its EXPO or XMP profile in the BIOS, a one-click step that a surprising number of first-time builders forget, leaving fast memory crawling at base speed.
Storage: make it an NVMe SSD
Storage is one of the easiest decisions: your main drive should be a fast NVMe SSD, not a mechanical hard drive. It is what makes the whole system feel quick, with near-instant start-up and program loading, and modern motherboards have M.2 slots ready for it. A 500GB or 1TB NVMe SSD for Windows and your programs suits most people.
If you need lots of space for large files like video or a game library, a sensible approach is a fast NVMe SSD for the system plus a larger drive for bulk storage. Our guide on why you should choose an SSD explains why this single choice makes more difference to everyday speed than almost anything else in the build.
You will also face a choice between PCIe Gen4 and the newer, faster Gen5 NVMe drives, and here the honest advice is to save your money. On paper Gen5 roughly doubles the headline sequential speeds, but in real-world use, and gaming in particular, the difference is tiny: games load lots of small scattered files rather than one giant stream, and that random-access speed has barely changed between the generations. Independent reviews repeatedly show game load times differing by a fraction of a second between a good Gen4 drive and a much pricier Gen5 one, and Gen5 drives also run hotter. Unless you do heavy professional file work, a quality 1TB or 2TB Gen4 NVMe drive is the smart buy in 2026. Whatever you choose, plan a backup from day one, because an SSD failure gives little warning; our note on why backing up matters is worth a read before you trust a single drive with anything you cannot lose.
Do not skimp on the power supply

If there is one place not to save money, it is the power supply. A cheap, generic PSU is the most common weak point in budget and prebuilt machines, and a poor one can run unstably, fail early, or in the worst cases take other components down with it. We have seen exactly how destructive that can be, as our write-up on a power supply failure shows. A flaky PSU is also a classic hidden cause of mysterious instability, so if a machine ever starts crashing or restarting at random, the power supply is one of the first things worth ruling out.
Choose a quality unit from a reputable maker, with an 80 Plus efficiency rating and enough wattage to power your components with headroom to spare, typically 20 to 30 percent above the system's expected draw, which also leaves room for future upgrades. The 80 Plus scheme, explained on Wikipedia's 80 Plus page, certifies how efficiently a unit turns wall power into usable power, running from Bronze up through Gold, Platinum and Titanium; aiming for Gold or better gives you a cooler, quieter, cheaper-to-run build that wastes less as heat.
Sizing the wattage is simpler than it looks. Add up the rated power of your processor and graphics card, add roughly 100W for everything else, then add your 20 to 30 percent headroom. A mid-range build with a 170W processor and a 250W graphics card comes to around 520W before headroom, so a quality 750W unit is a sensible match. As a quick guide, mainstream RTX 50 builds are happy on a good 650W to 750W unit, an RTX 5080 wants 850W or so, and an RTX 5090 belongs on a 1000W-plus supply. One more 2026 detail: look for a modern ATX 3.1 unit with the native 12V-2x6 connector for current Nvidia cards, because these handle the brief power spikes big graphics cards produce far better, and the newer connector seats more safely.
As an official be quiet! retailer, we stock properly engineered, quiet, well-protected units; you can browse the be quiet! power supplies in our shop, and if you are unsure what wattage you need, our PSU calculator will work it out for you. It is the cheapest insurance you can buy for an expensive build.
Balance the CPU and graphics card
For any build, and especially gaming, the processor and graphics card need to be matched to each other and to your use. Pairing a top-end graphics card with a weak processor (or the reverse) wastes money, because the weaker part holds the stronger one back, a problem known as bottlenecking.
For a gaming PC, the graphics card is usually the priority, taking a large share of the budget, paired with a capable but not necessarily flagship processor. For office and everyday use, integrated graphics built into the processor are often enough, and the money is better spent elsewhere. Build guides such as Tom's Hardware's balanced builds are a good reference for sensible pairings at each budget. The goal is balance: every part pulling its weight, none left waiting on another.
It helps to know that the balance also shifts with the resolution you play at. At 1080p the processor does more of the work and can become the limiting part, so a strong CPU matters; at 1440p and especially 4K the graphics card does the heavy lifting and the processor matters less, so the money flows towards the GPU. In plain terms: a 1080p high-refresh esports build leans on the CPU, while a 4K cinematic build leans on the GPU. Decide on your monitor's resolution and refresh rate at the same time as your parts, because there is no point buying a flagship graphics card to feed a basic 1080p screen, nor a 4K 144Hz monitor that your card cannot drive.
Plan for cooling and case clearance
Two practical things trip up first-time builders: cooling and fit. A processor needs adequate cooling to run at full speed without overheating, and for most builds a good air cooler is plenty; liquid cooling is really only needed for heavy overclocking or compact builds. Whatever you choose, fresh thermal paste and decent case airflow matter, as our guide to thermal paste and cooling explains, and if you are weighing liquid cooling, read our piece on the risks of water cooling first.
On the air-versus-liquid question, the modern reality is that a good air cooler is the right default for the vast majority of builds, not a compromise. A quality dual-tower air cooler matches an all-in-one (AIO) liquid cooler on gaming temperatures, runs quietly, costs less, and has nothing to fail: no pump to seize, no coolant to evaporate, no tubing to leak years later. An AIO earns its place when you are cooling a hot, high-core-count processor for long all-core workloads like rendering or heavy streaming, or when you want the cleaner look and have a case suited to a 280mm or 360mm radiator.
On fit, check the obvious clearances before buying: that the graphics card is not too long for the case, that the cooler is not too tall, and that the case has room and airflow for everything. If you go for an AIO, confirm a radiator size your case officially supports, and make sure you have enough case fans, ideally pulling cool air in at the front and exhausting warm air at the back and top. A well-chosen case with good airflow keeps the whole system cooler, quieter and longer-lived.
The build itself: assembly order and the pitfalls to avoid
Once the parts arrive, a sensible order of assembly saves time and avoids the most common mistakes. You do not have to follow it exactly, but most builders work roughly like this:
- Fit the processor into the motherboard first, gently and the right way round (line up the marked corner), with the board out of the case on its box for easy access.
- Install the memory next, in the slots your motherboard manual recommends for dual channel (often slots two and four), pressing until the clips click.
- Fit the M.2 NVMe SSD into its slot and secure it, ideally under the board's heatsink.
- Mount the CPU cooler. If it is a tall air cooler, do this before putting the board in the case; an AIO radiator usually mounts to the case.
- Install the power supply and the motherboard into the case, then route and connect the main power cables.
- Fit the graphics card last, into the top PCIe slot, and connect its power cable fully.
The pitfalls that catch people out are nearly always small things. Forgetting the rear input and output shield (or not realising it is built into the board) means taking the board back out. Connecting case fans and the cooler pump to the wrong headers can leave fans not spinning, so follow the manual for the CPU_FAN and pump headers. The tiny front-panel connectors for the power button and LEDs are fiddly and easy to misplace, so check the manual's diagram carefully. And loose cables can foul a spinning fan, so tidy them away before you close the case. Take your time, work on a hard surface rather than carpet, and handle parts by their edges. Nothing here requires brute force; if something does not seat easily, stop and check the orientation rather than pushing harder.
First boot, BIOS and what to do next
The first boot is where nerves kick in, and it helps to know that a build not springing to life on the very first press of the button is common and usually fixable, not a sign of broken parts. Before you press it, do a final check: power supply switch on, the main 24-pin and CPU power cables fully seated, the graphics card power connected, memory clicked firmly into place, and the monitor plugged into the graphics card rather than the motherboard's display output.
When it powers on, your goal is to reach the BIOS (usually by tapping Delete or F2 at start-up). In there, confirm the BIOS recognises your processor, the full amount of memory, and your SSD. This is also the moment to switch on the memory's EXPO or XMP profile so your RAM runs at its rated speed rather than the slow default. Set the boot order to your SSD, save, and you are ready to install Windows from a USB stick. After Windows is on, install the latest motherboard chipset drivers and your graphics card drivers, then run Windows Update, and your machine is ready to use.
One scenario worth knowing about: if you have paired a brand-new processor with a motherboard that shipped with older firmware, the board may need a BIOS update before it will recognise the chip, which can cause a build that looks dead. Many modern boards have a BIOS flashback feature that updates from a USB stick without a processor fitted. Our note on updating the motherboard BIOS explains when this matters and how to approach it safely. If the machine still will not POST after the basics are checked, do not panic and do not start forcing things; that is exactly the kind of thing we can sort out quickly.
Common mistakes first-time builders make
Most build problems are not exotic; they are the same handful of avoidable slips. Knowing them in advance is half the battle:
- Buying parts that do not match. The wrong socket, the wrong memory type, or a graphics card too long for the case. A parts-picker tool that flags incompatibilities prevents nearly all of these.
- Cheaping out on the PSU. The single most damaging false economy, for the reasons above.
- Forgetting to enable the memory profile. Leaving fast RAM at its slow default speed is one of the most common and least noticed mistakes.
- Plugging the monitor into the motherboard. If you have a graphics card, the monitor must connect to it, not the board's display output, or you will see no picture or poor performance.
- Skipping cable management and airflow planning. A tangle of cables hurts airflow and can foul fans, and a case with poor airflow runs hot and loud.
- No backup plan. A new PC feels invincible, but drives still fail. Set up a backup before you fill it with anything you would hate to lose.
None of these are hard to avoid once you know about them, which is exactly why planning beats improvising.
Future-proofing: where it pays, and where it does not
Future-proofing is sensible in moderation and wasteful in excess. The trick is knowing where a little extra spend genuinely extends a machine's life and where it just burns money on power you will never use.
Worthwhile future-proofing usually means: a good power supply with wattage headroom so it can power a bigger graphics card later; a motherboard on a platform with a future upgrade path (a strong point for AMD's AM5); enough memory capacity to avoid a swap in a year; and a case with room for larger parts and better cooling. These choices cost a little now and save money and hassle later, because they let you upgrade one part at a time rather than rebuilding.
Less worthwhile is paying a heavy premium for the absolute newest, fastest version of something whose real-world benefit is tiny, such as a Gen5 SSD for a gaming-only machine, or far more processor cores than your software can use. The value sweet spot, a strong mid-range part bought today, will almost always serve you better than stretching for the flagship. Build well, leave sensible headroom, and plan to upgrade the graphics card or add storage in a couple of years. That upgrade-friendliness is one of the best reasons to build, and if you would rather we handle a later upgrade for you, we are always here.
Build it yourself, or buy a custom build?
Finally, decide whether to build it yourself, buy a prebuilt, or have a custom build made. Building yourself gives total control and can save money on higher-end machines, but it takes time, care and a willingness to troubleshoot. Off-the-shelf prebuilts are convenient, but they are exactly where corners get cut, most often on the power supply, memory configuration and warranty.
A custom build from a local specialist is the middle ground: you get the exact parts you want, properly assembled and tested, with a real warranty and someone local to call if anything goes wrong. That is what we offer. We will help you choose balanced, compatible components for your budget and needs, build and test the machine, and support it afterwards, whether that is a new custom build or an upgrade to an existing PC. And if you are reusing parts, our note on updating the motherboard BIOS is worth a read, since a new CPU sometimes needs it.
It is also worth weighing the value of your own time. A self-build that goes smoothly is deeply satisfying, but if a single part is faulty out of the box, diagnosing which one can eat an evening or two. With a custom build from us, the testing and any warranty headaches are ours to handle, not yours. For some people the hands-on experience is the whole point; for others, a working machine on day one is worth far more.
How Manchester PC can help
Whether you want a full custom build, advice on a parts list before you buy, or help upgrading the machine you already have, we are happy to help. We will make sure everything is compatible and balanced, that the power supply and cooling are up to the job, and that the finished machine is built and tested properly, with honest advice on where to spend and where to save.
We cover Manchester and the surrounding areas with free local collection and return. To talk through a build or upgrade, get a free, no-obligation quote or call us on 0161 820 1992, and have a look at our computer services while you are at it.