Key takeaways
- After a self-installed upgrade (Asus Prime B660M-K board, Intel i5-12400F, RTX 3060, 32GB RAM), this Manchester gaming PC would not power on at all.
- The motherboard had not been fitted correctly and some wires were loose, so we corrected the installation and reseated the board.
- The owner's old M.2 SSD was a SATA drive while the new board's slot expected the faster PCIe (NVMe) type, so we cloned everything to a new PCIe SSD.
- A PC that will not boot after an upgrade is almost always a fixable installation or compatibility issue, not dead hardware, sorted by working through connectors, seating and compatibility in order.
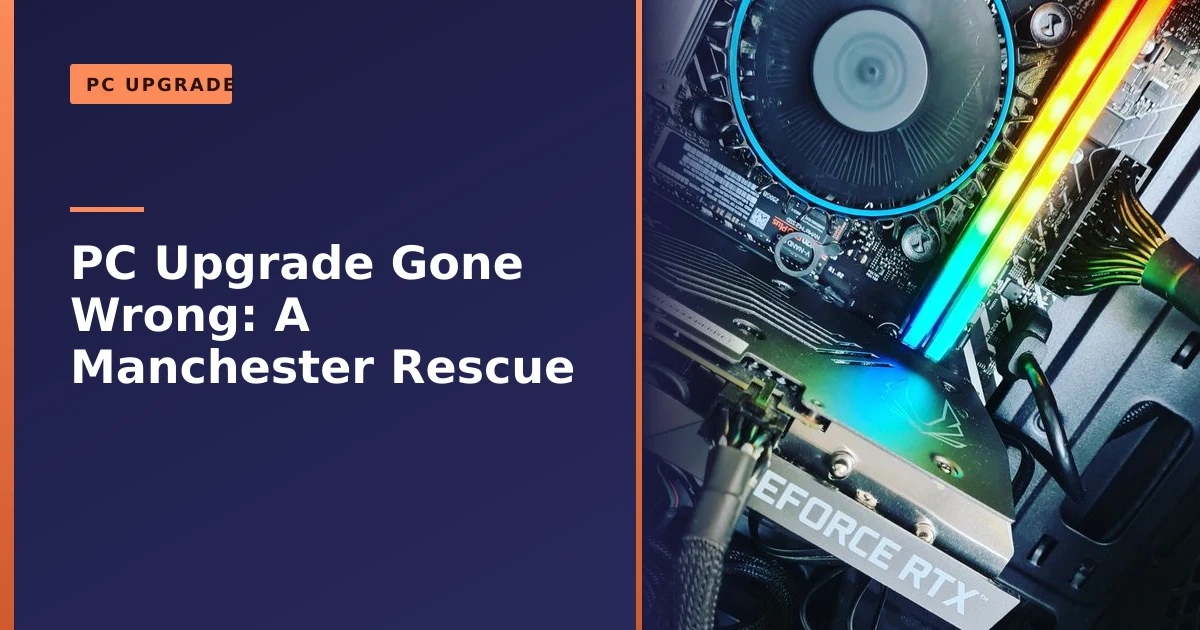
Upgraded your PC and now it will not turn on? It is a common and usually fixable situation. This gaming PC came to us in Manchester after its owner fitted a raft of new parts, an Asus Prime B660M board, Intel i5-12400F, 32GB RAM and an RTX 3060, only for the machine to refuse to power on. The causes turned out to be installation slips and an SSD mismatch, all sorted. Here is what went wrong, how we fixed it, and how you can avoid the same traps.
What came in: a fresh upgrade that would not wake up
The owner had given their rig a serious boost with quality components: an Asus Prime B660M-K D4 motherboard, an Intel i5-12400F processor, 32GB of Corsair memory, a Zotac RTX 3060 12GB graphics card and a Corsair power supply. On paper, a great mid-range gaming setup, the sort of build that handles 1080p and 1440p gaming comfortably for years.
In practice, after the upgrade the PC would not power on at all. No fans, no lights, no beep, nothing. That total silence is exactly what worries people most, because it feels like something expensive has died. The owner was understandably anxious they had damaged their new parts. We quoted up front, arranged free local collection and had it on the bench the same morning. As so often, the reality was far less dramatic than it looked.
What had gone wrong, and how we fixed it
Careful inspection revealed two separate issues working together, which is common with self-installed upgrades: rarely a single dramatic fault, more often two or three small things that each, on their own, would stop the machine.
First, the motherboard had not been installed quite correctly, and some internal wires had come loose or were not connected properly. When a board is not sitting flat and square, or a key power lead is not fully home, the system simply will not start. We took the build back to basics, checked the board was mounted on its standoffs with nothing fouling the back of it, reseated it, and worked methodically through every cable: the 24-pin main power connector, the separate CPU power lead, the front-panel switch and LED wires, and the power leads to the graphics card. With everything seated and routed properly, the machine had what it needed to start normally.
Second, we found a compatibility mismatch. The owner's existing M.2 SSD used the older SATA standard, while the new motherboard's M.2 slot was configured for the much faster PCIe (NVMe) type of drive. An M.2 SATA drive can physically slide into many M.2 slots, which is exactly why this trips people up, but if the slot is wired for PCIe only, the SATA drive will never be detected. With the owner's go-ahead we cloned everything across to a new Samsung PCIe drive, keeping all their files, programmes and Windows setup exactly as they were. With the installation corrected and the right SSD fitted, the PC powered up first time and ran beautifully, now making full use of its new hardware and noticeably faster to boot than before.
Why a PC will not power on after an upgrade
If your own upgrade has ended in a dead machine, take heart: the list of likely causes is short, and most of them cost nothing to fix. When a freshly upgraded PC will not start, the usual suspects are almost always installation or seating problems rather than faulty components. Here are the ones we see most often, roughly in order of how common they are.
- A power connector not fully seated. Modern boards need two separate power leads from the supply: the large 24-pin connector along the edge, and a 4-pin or 8-pin CPU power lead near the top, often hidden behind the cooler. Forget the CPU lead, or fail to click it fully home, and you typically get no power on at all. This is the single most common no-boot cause we see.
- The board shorting against the case. A motherboard must sit on small brass spacers called standoffs so that the back of it never touches the metal case. A missing standoff, or a spare one left in the wrong place under the board, can cause a short that stops the machine starting. Intel, Micro Center and others all flag standoff problems as a classic first-build fault.
- Front-panel wiring in the wrong place. The tiny wires from the case (power switch, reset, power LED) plug onto a small block of pins on the board. Get the power switch pair wrong and pressing the button does nothing. These connectors are fiddly and easy to misread, so they are always worth double-checking against the motherboard manual.
- RAM not clicked fully in. Memory needs a firm, even push until the clips snap shut at both ends. Partly seated RAM is a very common reason a PC powers up but shows no display, or refuses to POST at all. Reseating the sticks, one at a time if needed, fixes it surprisingly often.
- Graphics card not fully seated, or unplugged. A dedicated card like the RTX 3060 needs to be pressed firmly into its slot until it clicks, and it needs its own power lead from the supply. A card that has popped up slightly at one end, or has no power connected, can leave you with no display.
- A compatibility mismatch. Even when everything is plugged in correctly, the wrong type of part can stop things working as expected. The SATA versus PCIe SSD issue in this case is a perfect example, but unsupported RAM or a CPU the board cannot run without a BIOS update will do it too.
Notice that none of these means a dead component, which is the point worth holding on to before you spend on replacement parts. If your machine powers up but then crashes or restarts rather than failing to start, our guide to fixing random PC crashes and restarts covers a related set of causes.
The order we work through a no-boot PC
Diagnosing a dead PC is far easier when you follow a sensible order rather than poking at random. This is broadly the sequence we use on the bench, and you can follow it at home with a screwdriver and patience.
- Check the obvious first. Is the wall socket switched on, the supply's own switch set to on, and the power lead firmly in? A knocked switch catches everyone out at some point.
- Reseat the two power leads. Unplug and firmly reconnect the 24-pin board connector and the CPU power lead. Listen for the click.
- Check for shorts. Confirm the board is on its standoffs and nothing metal is touching the back of it. Builders sometimes take the board out and test it on its anti-static box or a wooden surface, known as breadboarding, to rule the case out entirely.
- Strip it back. Disconnect everything that is not essential: extra storage, spare case fans, front-panel USB. Leave one stick of RAM, the CPU and cooler, and the graphics if the chip has no built-in display. A bare system that boots tells you the fault is in something you removed.
- Test the power button. If the front-panel wiring looks suspect, briefly bridge the two power switch pins with a screwdriver to start the board, which rules the case button in or out.
- Reseat RAM and graphics. Push each firmly home until the clips and latches engage, trying one RAM stick at a time if there is still no display.
That list resolves, or at least pinpoints, the great majority of no-boot situations. If you reach the end and it is still silent, stop and get it looked at rather than swap parts on a guess.
Common PC upgrade pitfalls to watch for
Upgrading your own PC is genuinely rewarding, and we never want to put anyone off having a go. A few traps catch people out, though, and two of them were at play in this build:
- Loose or wrong connections. A board that is not fully seated, an unplugged power lead, or a loose front-panel wire will stop a PC booting every time. After any upgrade, slow down and double-check every single connection before you press the button.
- Component compatibility. Not all parts fit all systems. M.2 SSDs come in SATA and PCIe types, RAM must match the board's generation (DDR4 or DDR5) and speed, and the CPU must be on the board's supported list. Checking compatibility before buying saves a great deal of grief.
- Static and handling. Components are sensitive to static electricity, so careful handling matters more than most people realise.
- Not updating the BIOS. A newer processor sometimes needs an updated BIOS before an older board will recognise it at all.
If you are planning a build or upgrade, our guide on things to consider before building a new PC covers what to check, our guide on SSD upgrades explains the different drive types in plain English, and if you are weighing up more memory, do I need extra memory is a useful read.
SATA versus PCIe (NVMe) M.2 SSDs explained
The SSD mismatch in this build is worth a proper explanation, because it is one of the most misunderstood parts of any upgrade. The confusion comes from two very different drives looking almost identical and slotting into the same shaped connector.
M.2 is simply the shape and size of the drive, the small stick that screws flat onto the board. It is a form factor, not a speed. Two things decide how a drive behaves: the interface (the connection it uses) and the protocol (the language it speaks). There are two combinations you will meet:
- M.2 SATA. This uses the same older SATA connection that traditional 2.5-inch SSDs and hard drives use, just in the smaller M.2 shape. According to Corsair, SATA tops out at around 550 to 600MB/s. That is still far quicker than a spinning hard drive, but it is the slow lane by modern standards.
- M.2 PCIe (NVMe). This uses the PCI Express lanes on your board, the same fast lanes a graphics card uses, and speaks a protocol called NVMe that was, in Wikipedia's words, designed from the ground up for the low latency of PCIe storage. Corsair quotes PCIe 3.0 drives at around 3,500MB/s, PCIe 4.0 at roughly double that, and the latest PCIe 5.0 drives reaching up to 14,000MB/s.
Here is the trap, and exactly what happened in this case. An M.2 slot is keyed and wired for particular interfaces. As the Wikipedia M.2 entry explains, the notch in the connector indicates which interfaces a slot supports, and many host slots are built for just one. A SATA M.2 drive can physically fit into a slot that only carries PCIe signals, but it will simply never be detected, because the slot has no SATA wiring behind it. There is no error, no smoke, just a drive that does not appear. The reverse is true too: a PCIe NVMe drive will not work in a SATA-only slot.
The short comparison below sums up the difference.
| Feature | M.2 SATA | M.2 PCIe (NVMe) |
|---|---|---|
| Connection | SATA lanes | PCI Express lanes |
| Protocol | AHCI (older) | NVMe (modern) |
| Typical speed | around 550 to 600MB/s | around 3,500MB/s and up |
| Looks like | small M.2 stick | small M.2 stick (nearly identical) |
| Will it fit any M.2 slot? | Only if the slot supports SATA | Only if the slot supports PCIe |
The practical lesson is simple: never assume an M.2 drive is fast just because it is M.2 shaped, and always check what your specific slot supports in the motherboard manual before buying. NVMe, explained in more depth on the Wikipedia NVM Express page, is what gives a modern PC that instant feel, so on a board like the B660M-K it is well worth fitting the right drive.
Cloning versus a fresh install when you change the drive
Once we had established the old SATA drive would not run in the new board, the question became how to get the owner's data and Windows onto a compatible PCIe drive. There are two routes, and each has its place.
Cloning copies the entire existing drive, Windows, programmes, settings and files, onto the new one so the machine boots up exactly as before. It is the quickest way to get running again with nothing to reinstall. The trade-off is that anything unhealthy on the old drive, including clutter, comes along too, so cloning suits a healthy system, as here.
A fresh install puts a clean copy of Windows on the new drive with nothing carried over. It is the better choice if the old system was sluggish, cluttered or unstable. The cost is your time, as every programme and setting has to be redone, and you must back up your files first because the old drive is wiped.
| Consideration | Cloning | Fresh install |
|---|---|---|
| Time to get running | Fast, often under an hour | Slower, reinstalling everything |
| Keeps your programmes and settings | Yes | No, set up again |
| Leaves old clutter behind | No, it carries over | Yes, clean slate |
| Best when | System is healthy and you want it back as-is | System was slow, messy or unstable |
For this customer, cloning to the Samsung PCIe drive was the sensible choice: a healthy system, nothing wrong with their setup, and the least disruption. Whichever route you take, a current backup first is non-negotiable, which is why we always recommend reading up on why backing up your data is critical and, if you would rather not risk it yourself, our data recovery and computer backup services are here to help.
How to check compatibility before you buy
Most upgrade headaches are designed out before any spending happens. Five quick checks cover the vast majority of mistakes.
- CPU and socket. The processor must match the board's socket and be on its supported list. A newer chip may need a BIOS update before an older board will boot it, so check the board maker's CPU support page.
- RAM type and speed. DDR4 and DDR5 are not interchangeable and use different slots. The B660M-K D4 in this build is a DDR4 board, so it needs DDR4 memory, not DDR5. Check the maximum supported capacity and speed too.
- The M.2 slot. Confirm whether each M.2 slot is SATA, PCIe, or both, exactly the check that would have prevented this whole job. The motherboard manual lists this for every slot.
- Power supply. Make sure the supply has enough wattage and the right connectors for your graphics card.
- Physical fit. Check the graphics card length, cooler height and board size all fit the case before ordering.
A few minutes with the motherboard manual and the manufacturers' websites is the cheapest insurance there is. We are always happy to sanity-check a parts list before you buy, and our BIOS update guide explains when that step matters.
Static and safe handling of components
One risk that does not announce itself is static electricity. Electrostatic discharge, or ESD, is the small jolt you sometimes feel after walking across a carpet, and components are sensitive to it. The unsettling part, as the Wikipedia article on electrostatic discharge notes, is that a charge well below the threshold you can feel or see can still harm electronics, with damage sometimes showing up only later as odd, intermittent faults. A few simple habits remove the risk almost entirely:
- Build on a hard, non-carpeted surface where you can, and avoid working in socks on a fluffy rug.
- Ground yourself by touching an unpainted metal part of the case before handling parts, and again if you have wandered off and come back.
- An inexpensive anti-static wrist strap clipped to the case gives proper peace of mind.
- Hold cards and memory by their edges, not by the gold contacts or chips, and leave parts in their anti-static bags until needed.
None of this requires special skill, just a little awareness. It is the kind of careful handling that separates a smooth upgrade from a mysterious fault weeks later.
First boot and BIOS: the bit people skip
Getting a PC to power on is only half the job. The first boot is where you confirm the board has recognised everything and switch on the performance you have paid for. When an upgraded machine starts for the first time, work through these steps:
- Watch it POST. The board runs a Power-On Self-Test and should reach the BIOS screen within a few seconds, with the CPU, case and graphics fans all spinning. If it does not, that is your cue to go back to the no-boot checklist above.
- Enter the BIOS. Tap the key shown on the splash screen (often Delete or F2) to open the setup screen.
- Confirm the basics. Check the BIOS sees the right processor, the full amount of memory, and your new SSD. If a drive is missing here, that is your compatibility flag.
- Enable the memory profile. Memory often runs slow until you switch on its rated profile, called XMP on Intel boards like this one. Turn it on so your 32GB runs at full speed rather than a conservative default.
- Set the boot order. Point the board at your Windows drive so it starts cleanly.
- Set the date and time, then save and exit.
That ten-minute routine is the difference between a PC that merely works and one that runs as well as the parts allow. Skipping the memory profile in particular leaves real performance on the table.
A post-upgrade checklist worth keeping
Before you close the case, run through a short final check. It catches the small slips that cause the no-boot panic in the first place.
- Both power leads, the 24-pin and the CPU lead, fully clicked in.
- RAM seated with the clips snapped shut at both ends.
- Graphics card pressed fully home with its power lead connected.
- Front-panel switch and LED wires on the correct pins.
- The board sitting on its standoffs with nothing touching the back of it.
- All storage drives connected, and the right type of M.2 drive for your slot.
- No loose screws rolling around inside the case.
- BIOS confirms the CPU, full memory and your drive, with the memory profile enabled.
Tick those off and the odds of a clean first boot rise sharply. It is the same checklist we run on every machine before it leaves us.
Cost, time and when to call in a pro
People often imagine a non-booting PC is an expensive, drawn-out repair. In reality, a no-boot caused by seating or wiring is one of the quicker jobs we do, because once the fault is found the fix is straightforward, and the value is in finding it fast and confirming nothing is damaged. It is worth bringing a machine to us, rather than pressing on alone, when any of the following is true:
- You have worked through the connector, seating and short checks and it is still silent.
- You are not confident handling the CPU, cooler or the board itself.
- You suspect a compatibility issue but cannot pin it down, such as a drive that will not appear.
- You need data moved or cloned safely from an old drive to a new one.
- You would simply rather have the whole upgrade fitted and tested properly first time.
There is no shame in any of that. Many of the upgrades we finish started as someone's own project, and we are glad to get them across the line. If you would like a build, upgrade or repair handled start to finish, our computer service and custom build repair pages explain how we work.
No need to panic
A PC that will not boot after an upgrade looks alarming, but it is very rarely dead hardware. Far more often it is a fixable installation or compatibility issue, exactly as it was here: a board that needed reseating, a few wires put right, and the correct type of SSD fitted. If your own upgrade has left you stuck, it is well worth having it checked rather than assuming the worst or buying yet more parts. The fix is usually simpler, quicker and cheaper than the fear.
How Manchester PC can help
Upgraded your PC and it will not start, or want an upgrade done right first time? We diagnose and fix failed upgrades, check compatibility before you spend, fit components properly and clone your data safely to new drives. We quote before any work, so you always know where you stand.
We cover Manchester and the surrounding areas with free local collection and return, fair pricing and honest advice, and we will always tell you when a repair is not worth it rather than push one. For a PC repair, an upgrade, or any computer repair, get a free, no-obligation quote or call us on 0161 820 1992.