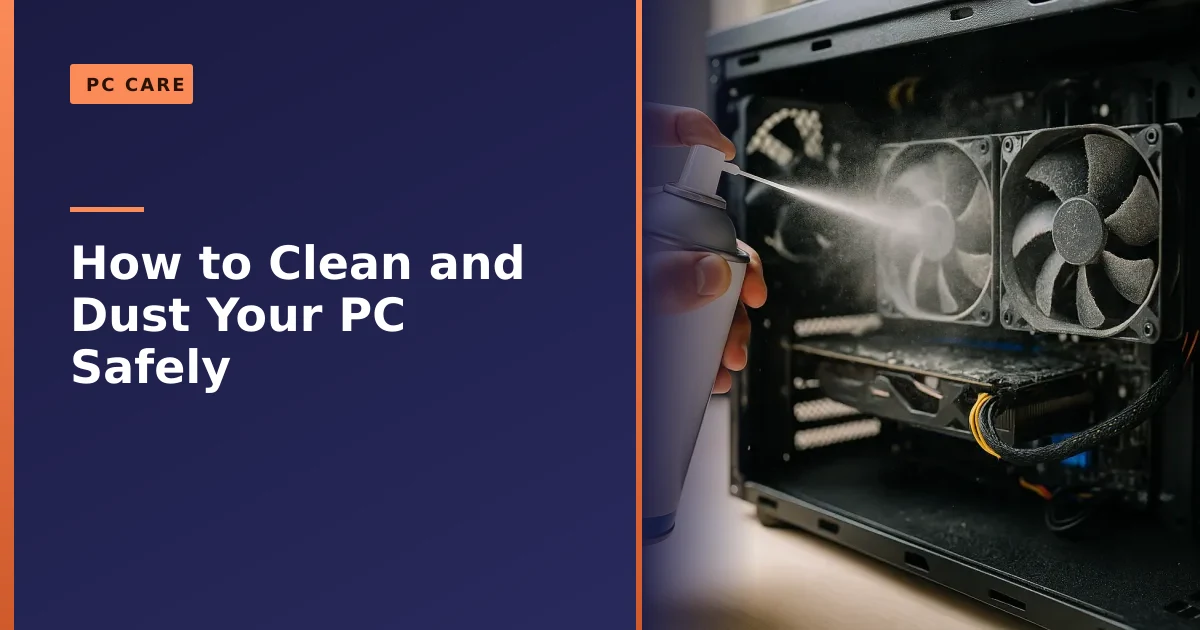
To clean and dust your desktop or gaming PC safely, power it off and unplug it, open the side panel, and blow the dust out with short bursts of compressed air or an electric anti-static blower while holding each fan still with a finger. Never use a household vacuum, and never spray liquid inside.
Key takeaways
- Dust is an insulator. A clogged PC runs hotter, throttles, gets louder, and wears out sooner, so a clean every three to six months pays for itself.
- Use canned air kept upright or a reusable electric PC blower. Do not use a household vacuum cleaner, because it builds up static that can damage components.
- Always hold each fan still while you blow it. A fan spun by a jet of air can generate voltage that stresses nearby parts and can wear the bearing.
- Power off, unplug at the wall, and touch bare metal to discharge static before you touch anything inside the case.
- Thermal paste is not part of a routine dust. Re-paste every two to four years, or sooner if temperatures keep climbing.
- If you would rather not open the case, our servicing and re-paste service does the whole job for you, with free local collection and return.
Dust is the quiet killer of desktop and gaming PCs. It drifts in through the intake fans, settles on the heatsinks, and slowly wraps every cooling surface in a felt-like blanket. Because that blanket traps heat instead of moving it away, a neglected machine ends up hotter, noisier, and slower than it should be, and in the worst cases it shuts itself down mid-game. The good news is that cleaning a PC is one of the most satisfying and worthwhile jobs you can do at home, as long as you do it the safe way. This guide walks through every step, the tools that help, the mistakes that cause damage, and when it is worth handing the job to our PC repair service in Manchester instead.
Why cleaning your PC actually matters
It is easy to think of dusting as cosmetic, but inside a computer it is pure performance and reliability. Every processor and graphics card produces heat, and the whole cooling system, meaning fans, heatsinks, radiators, and thermal paste, exists to move that heat out of the case as fast as it is made. Dust breaks that chain in several ways at once.
- It insulates the hot parts. A layer of dust on a heatsink acts like a tiny duvet, holding warmth against the metal instead of letting air carry it away.
- It clogs the fins. CPU coolers and graphics cards push air through tightly packed metal fins. When dust bridges those gaps, airflow collapses and temperatures climb.
- It chokes the intake. Dust mats over intake filters and fan blades, so the whole case starves of fresh air.
- It unbalances fans. Uneven dust on blades makes fans wobble, rattle, and spin up louder to compensate.
The payoff for keeping things clean is real and measurable. Lower CPU and graphics temperatures mean less thermal throttling, which is when a chip deliberately slows itself down to avoid overheating. Less throttling means steadier frame rates in games and quicker exports and renders in creative work. A cooler machine also runs its fans slower, so it is quieter, and cooler components simply last longer, because heat is what ages capacitors, bearings, and solder joints over the years. If your machine already runs hot, our guide on why your gaming PC overheats digs into the other causes worth checking. And if it feels sluggish rather than hot, dust is only one suspect on the list in why your desktop PC is so slow.
What you will need (and what to avoid)
You do not need a workshop full of kit. Most of a good clean is done with a can of air and a soft brush. Here is the sensible tool list, along with the things people reach for that quietly cause damage.
Worth having:
- Compressed air (a can of canned air) or, better for regular use, an electric anti-static PC blower you can use again and again.
- A soft anti-static brush or a clean, dry make-up brush for loosening stubborn dust on filters and fins.
- A microfibre cloth for the outside of the case, the glass panel, and cable runs.
- Cotton buds for tight corners around ports and fan hubs.
- A small Phillips screwdriver for panels and, if needed, fan mounts.
- Isopropyl alcohol (90 percent or higher) and lint-free wipes, only needed if you are re-pasting the CPU, not for a routine dust.
Best avoided inside the case:
- A household vacuum cleaner. The airflow over the plastic nozzle builds up a static charge that can discharge into your components. This is exactly the kind of electrostatic discharge that can damage sensitive electronics, sometimes without any visible sign until the part fails later.
- Feather dusters, tissue, or a dry rag on internal parts. They shed fibres and can leave residue on delicate surfaces.
- Water, sprays, or household cleaners inside the machine. Anything wet near live circuitry is asking for trouble.
- A leaf blower or workshop compressor at full power. Far too strong, and workshop compressors can spit moisture and oil into the case.
Compressed air, electric blower, or vacuum: which to use
The way you move dust out of the case matters as much as how often you do it. The table below sums up the three tools people reach for and why one of them should stay in the cupboard.
| Method | Good points | Watch out for | Verdict |
|---|---|---|---|
| Canned compressed air | Cheap, precise, gets into tight fins, no static | Runs out, gets very cold, must stay upright or it spits liquid | Great for occasional cleans |
| Electric anti-static blower | Reusable, strong steady airflow, no propellant, works out cheaper over time | Higher up-front cost, can be powerful so keep your distance | Best for regular gaming PC upkeep |
| Household vacuum cleaner | You already own one | Builds static, weak at pulling dust from fins, can knock components | Do not use inside the case |
Two rules apply whichever air source you pick. First, if you use canned air, keep the can upright and use short bursts. Tilt it and the liquid propellant inside can escape as a freezing spray, which chills components and leaves condensation behind. Second, keep the nozzle a few centimetres back and blow in short bursts rather than one long blast, so you shift the dust without driving it deeper or icing anything up. If you own a wet-and-dry or electronics vacuum, it is fine to hold the nozzle near an open vent to catch dust as it comes out, but never poke it inside or run it against the boards.
Before you start: static and safety
Static electricity is invisible and the damage it does can be too. A charge built up in your body from walking across a carpet is more than enough to harm a chip, so a couple of minutes of preparation protects the whole machine. Work through this before you touch anything inside.
- Shut down and unplug. Turn the PC off through Windows, then switch off the power at the wall and pull the mains lead out of the back.
- Discharge the leftover power. With the mains lead out, press and hold the case power button for around ten seconds. This drains the residual charge stored in the power supply and motherboard.
- Pick a hard surface. Work on a table or a hard floor, not on a carpet or a bed, because soft furnishings generate static as you move around.
- Ground yourself. Touch a bare metal part of the case before you reach inside, and touch it again every so often. Better still, wear an anti-static wrist strap clipped to the chassis. Avoid working in socks on carpet.
- Mind the weather. Very dry air makes static worse, because there is no moisture on surfaces to let the charge bleed away harmlessly, so a normal humid day is actually your friend here.
Take the machine somewhere with a bit of space and, ideally, take it outside or into a garage for the blowing stage, because a surprising amount of dust comes out and you do not want it settling straight back onto the desk it came from.
Step by step: cleaning the inside of your desktop
With the power out and yourself grounded, you are ready to open up and clean. Take your time, and photograph anything you unplug so it goes back the same way.
- Open the case. Remove the thumbscrews at the back of the side panel and slide it off. On a glass-panel case, support the glass with both hands.
- Have a look first. Note where the dust is thickest. On most machines that is the front intake filters, the bottom of the case, the CPU cooler, and the graphics card.
- Hold each fan still, then blow it. This is the single most important habit. Put a finger or a cotton bud gently against the fan blades to stop them spinning, then blow the dust off. A fan that is spun by the jet of air acts like a tiny generator and can feed voltage back into the board, and over-spinning also tires out the bearing. Hold, blow, move on.
- Work top to bottom, back to front. Dust falls, so start high and finish low. Blow the CPU cooler, then the graphics card, then the case fans and the floor of the case.
- Do the tight spots. Use short bursts to clear the rear exhaust grille, the ports, and the gaps around the RAM and expansion slots. A soft brush helps lift dust that air alone will not shift.
- Clean the outside. Wipe the case, the glass, and the front panel with a slightly damp microfibre cloth. Dry it before the panel goes back on.
- Refit and test. Slide the panel back on, reconnect everything, power up, and check that all the fans spin. Listen for any new rattle, which usually means a cable has drifted into a fan.
Cleaning the parts that matter most
A general blow-through helps, but the components that make the biggest difference to temperatures deserve a closer look. Here is how to treat each one.
- The CPU cooler. On an air cooler, blow through the stack of metal fins from one side so the dust is driven out the other, holding the fan still as you go. On an all-in-one liquid cooler (AIO), the radiator is a dense grid of fins that hides a lot of dust, so blow through it slowly and thoroughly. There is no need to touch the pump or the tubing. If you are curious about the wider debate on liquid cooling, our piece on the risks of water cooling a PC is worth a read.
- The graphics card. The GPU is often the dustiest and hottest part of a gaming PC, and its heatsink fins clog easily. Hold each of its fans still and blow the dust straight out through the fins. A clean graphics card can drop several degrees, which is often the difference between smooth frames and a stuttering, throttling mess.
- The power supply (PSU). Blow dust out of the PSU intake fan from the outside only. Do not open the power supply. It holds a charge even when unplugged, and there is nothing inside a PSU a home clean should touch.
- Case fans and filters. Hold each case fan still and blow it clean. Pop out the intake filters (more on those next) and deal with them separately.
- RAM and slots. A gentle puff of air across the memory modules and into empty slots is plenty. There is no need to remove the RAM for a routine clean.
Dust filters and keeping dust out in the first place
Most modern cases have removable dust filters over the intake fans, usually a fine mesh in a plastic frame or a magnetic strip that lifts straight off. These do the heavy lifting of keeping the inside clean, so looking after them means the internals need a full clean far less often.
- Take them out and clear them. Slide or lift the filter away, then brush or rinse the dust off. If you rinse a washable filter under the tap, let it dry completely before it goes back near the machine.
- Aim for positive air pressure. If your intake fans move a little more air than your exhaust fans, the case stays slightly pressurised, so air is pushed out through every gap rather than sucked in. That means almost all the incoming dust arrives through the filtered intakes, where it is easy to clean, instead of through unfiltered cracks.
- Lift it off the floor. A PC sitting on a carpet drinks in dust and hair through the bottom intake. Standing it on a desk or a hard riser makes a noticeable difference.
How often should you clean? A rough guide.
- Every 3 months: homes with pets, smokers, or a PC on a carpeted floor.
- Every 4 to 6 months: a typical home or office on a desk.
- Quick filter check monthly: a ten-second glance at the intake filters catches build-up early.
Cable management for better airflow
Cleaning is only half the airflow story. A rat's nest of cables draped across the middle of the case blocks the very air you are trying to move, and it traps dust in the tangle. While the machine is open, it is worth tidying.
- Route the bulk behind the motherboard tray. Most cases have a gap and tie-down points behind the tray, so the thick power leads can run hidden and out of the airflow.
- Keep the front-to-back path clear. Air should flow from the intake fans, across the components, and out the back with as little in the way as possible.
- Do not block the fans. Make sure no loose cable can droop into a spinning fan, which causes that mystery rattle and can stall the blade.
Tidy cabling is not just for looks. It lowers temperatures, cuts the noise, and makes the next clean far quicker.
When to re-paste (replace the thermal paste)
Between the CPU and its cooler sits a thin layer of thermal paste, which fills the microscopic gaps so heat flows into the cooler efficiently. Over the years that paste dries out and can slowly squeeze out from the middle, a process known as pump-out, and when it does your temperatures creep up even on a spotless machine. Re-pasting is not part of a routine dust, but it is worth doing on a schedule.
- How often: roughly every two to four years for most desktops, or sooner if temperatures keep climbing despite a good clean.
- The signs: steadily rising idle and load temperatures, more frequent fan noise, or a machine that throttles or shuts down under load even after dusting.
- How it is done: the cooler comes off, the old paste is wiped away with isopropyl alcohol and a lint-free cloth, a fresh pea-sized dot goes on, and the cooler is refitted with even pressure. It is a careful job, and getting the amount and the seating right matters.
Plenty of people are happy to re-paste at home, but it is fiddly, and a badly seated cooler can make things worse. If you would rather it was done properly, our thermal paste replacement service in Manchester handles it as part of a full service, with quality paste and the temperatures checked afterwards. To be clear about what we do and do not do: we diagnose faults and replace or upgrade parts, including coolers, fans, and the paste itself. We do not carry out board-level or soldering repairs; where a board is faulty we replace the part or the whole board, or advise the best route.
How Manchester PC can help
A dust and re-paste is one of the cheapest ways to get real performance and years of extra life back from a desktop or gaming PC, and it is genuinely satisfying to do yourself. But if you would rather not open the case, if the machine is already running hot, or if you want the thermal paste refreshed and the temperatures checked properly, that is exactly what our PC servicing and cleaning is for. We strip out the dust, clean every cooling surface, tidy the cabling for airflow, re-paste where it is due, and hand it back running cooler and quieter.
We offer free local collection and return across Manchester, so you do not even have to carry it anywhere. Call us on 0161 820 1992, or get a fast, no-obligation price through our tech support quote page and we will tell you exactly what your machine needs.