Key takeaways
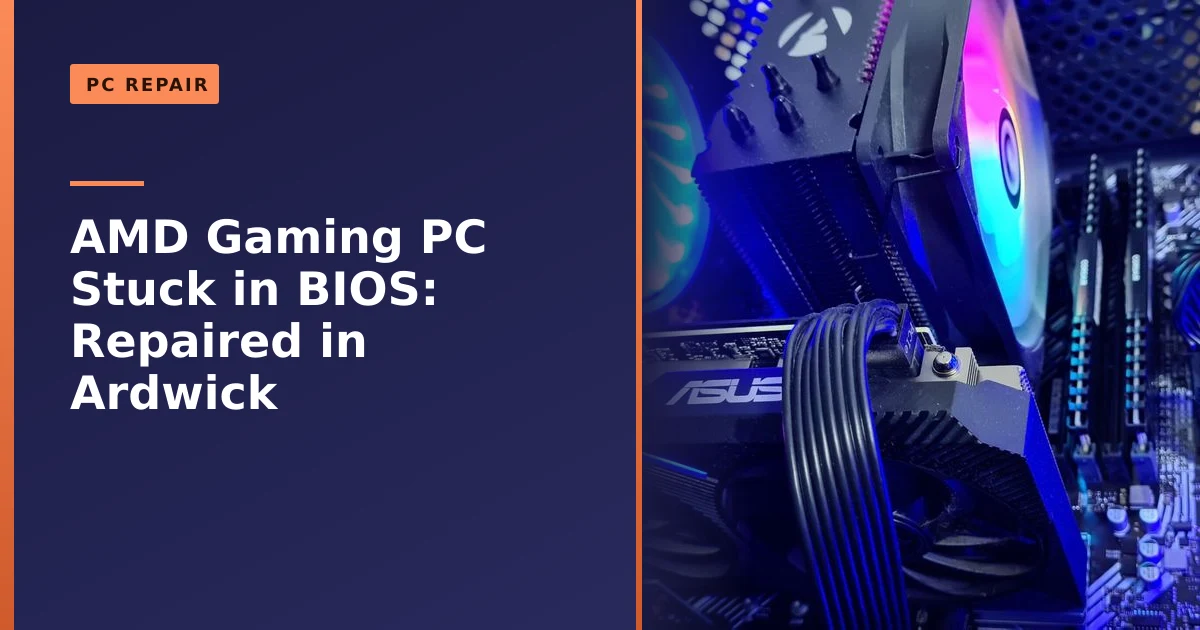
- This AMD gaming PC (Ryzen 7 5800X, B550M board) from Ardwick kept booting straight into the BIOS instead of Windows.
- The SSD and hardware tested fine; talking to the client revealed a recent Windows reinstall had gone wrong.
- We reinstalled Windows 11 cleanly and sorted the drivers, including using another PC to get network drivers.
- A PC that boots to BIOS is usually a boot or software issue, not dead hardware, and good diagnosis (and asking the right questions) is key.
- Most of the time you can narrow the cause down yourself in a few minutes by checking the boot order, the drive detection and what changed just before the fault appeared.
PC keeps booting into the BIOS instead of Windows? It is usually a fixable boot or software problem, not a hardware failure. This AMD gaming rig came to us in Ardwick, Manchester, a Ryzen 7 5800X on a B550M board, stuck in exactly this loop. The cause turned out to be a botched Windows reinstall, and a clean reinstall sorted it. Here is the diagnosis, the fix, and a proper walk through of why this happens so you can understand (and often sort) it yourself.
What came in: a powerful PC that would not load Windows
This was a serious gaming machine, an Asus Prime B550M-K motherboard, AMD Ryzen 7 5800X processor, 16GB of Corsair RAM and an Asus GeForce RTX graphics card, but it had an odd fault: instead of loading Windows, it booted straight into the BIOS every time. It is an alarming symptom that looks like a hardware failure, so the first job was to find out whether it really was.
It is worth pausing on why this is such a worrying symptom. The machine powers on, the fans spin, the BIOS screen appears clear and responsive, and then it simply will not go any further. That mismatch between a healthy looking machine and a complete failure to reach Windows is exactly why people fear the worst and assume an expensive part has died. In reality, a working BIOS screen is good news: it tells you the processor, memory and motherboard are all doing their jobs. The problem is almost always further down the chain, where the firmware hands over to the operating system.
How we diagnosed and fixed it
We started with the most likely hardware suspect, the SSD, and tested it, but it passed with flying colours. A thorough inspection of every other component found nothing wrong beyond the expected dust, a credit to the build quality. With the hardware ruled out, the breakthrough came from talking to the client, who mentioned a recent mishap during a Windows reinstallation. That was the missing piece: the problem was software, not hardware. We set about reinstalling Windows 11 cleanly. Installing the updates and drivers was not entirely routine, the machine had no network drivers, so we used another computer to download the essential drivers and get internet connectivity working over Ethernet and Wi-Fi. We then reassembled and retested every component to be sure of a smooth, stable result before returning it.
That last step, downloading drivers on a second computer, catches a lot of people out, so it is worth flagging early. A fresh Windows install does not always include the driver for your specific network adaptor. If your network is dead, you cannot use Windows Update to fetch the network driver, because you have no network. It is a chicken and egg trap, and it is one of the most common reasons a self attempted reinstall stalls. We will come back to how to avoid it later in this guide.
BIOS, UEFI and the boot process: what is actually happening
To understand why a PC lands in the BIOS, it helps to know what the boot process actually does. When you press the power button, the first thing that runs is the firmware on your motherboard. On modern machines this is UEFI (Unified Extensible Firmware Interface), the successor to the old BIOS, although nearly everyone still calls the setup screen "the BIOS". The firmware wakes up the processor and memory, checks the core hardware is present and working, and then looks for something to boot from. According to the UEFI specification, the firmware runs through several stages and finishes with a boot device selection phase, where it hands control over to whatever is set as the boot device.
That hand over is the crucial moment. The firmware reads its boot order list, goes to the first entry, and looks for a valid Windows boot loader (on modern systems this is the Windows Boot Manager). If it finds one, control passes to Windows and your machine carries on starting up. If it does not find one, it cannot boot anything, so it does the only sensible thing it can: it drops you into the BIOS setup screen and waits for a human to sort it out. So booting to BIOS is not really a fault in itself. It is the symptom of the firmware reaching the end of its boot list without finding anything it can start. Our guide on the motherboard BIOS explains more about this part of your PC and when it is worth updating.
Why does a PC boot into BIOS instead of Windows?
When a PC boots straight to the BIOS, it usually means the system cannot find a valid drive to boot Windows from. Common causes include a boot order set wrongly in the BIOS, a corrupted or incomplete Windows installation (as here), a loose or failing drive, or a drive that is not being detected. Because the symptoms overlap, the right approach is to confirm the drive is healthy and detected first, then look at the Windows installation and boot settings.
It is worth breaking those causes down, because each one points you towards a different fix:
- Wrong boot order. The firmware is trying to boot from the wrong device, for example a USB stick, an empty DVD drive, or a secondary drive with no operating system on it. The Windows drive is fine, it is just not first in the queue.
- Drive not detected. A loose SATA or power cable, an NVMe drive that has worked its way slightly loose, or a failing drive can all mean the firmware simply does not see your Windows disk. If the drive is not listed in the BIOS at all, this is your area.
- Corrupted or incomplete Windows installation. The drive is detected and healthy, but the boot files Windows needs are missing or damaged. This is the most common cause after a reinstall that went wrong, and it was the cause in this Ardwick repair.
- Firmware mode mismatch (UEFI versus legacy). The drive is healthy and Windows is on it, but it was installed in the wrong boot mode for how the BIOS is now set. We cover this in detail below because it trips up a lot of self installs.
- Cleared or drained CMOS settings. If the small motherboard battery has died or the settings have been reset, the boot order can revert to defaults and "forget" your drive. Re selecting the boot device usually fixes it.
A few things are worth checking at home: that the BIOS lists your drive and has it set as the boot device, and that no USB stick is plugged in that the PC might be trying to boot from. If the drive is healthy but Windows still will not load, the installation itself is the likely culprit, and a clean reinstall, done properly with the right drivers, is the cure.
Step by step: what to check when your PC boots to BIOS
If you are reasonably confident poking around the BIOS, you can often narrow this down in a few minutes before deciding whether to call anyone. Work through these in order and stop when something fixes it:
- Remove anything extra. Unplug USB sticks, external drives, and phones, and take any disc out of the DVD drive. A bootable USB left plugged in is a surprisingly common reason a PC will not start normally.
- Open the boot or storage section of the BIOS and look for your drive. Your Windows SSD or NVMe drive should be listed by name (something like "Samsung", "WD", "Crucial" or "Kingston"). If you can see it, the drive is alive and connected.
- If the drive is not listed, suspect a connection or the drive itself. On a desktop, with the power off at the wall, reseat the SATA data and power cables, or reseat the NVMe drive in its slot. If it still does not appear, the drive may be failing.
- Check the boot priority. Set "Windows Boot Manager" (or your Windows drive) as the first boot device. Save and exit. Many boards have a one off "boot menu" key (often F8, F11 or F12) where you can pick the drive without changing settings permanently, which is handy for testing.
- Load optimised defaults if things look scrambled. Most boards have a "Load Optimised Defaults" or "Load Setup Defaults" option. This is a safe reset of BIOS settings and can undo a bad change. You may then need to re enable XMP/EXPO for your RAM speed.
- Note what changed recently. Did you just reinstall Windows, update the BIOS, change a setting, swap a drive, or have a power cut? That single piece of information often points straight at the cause, which is exactly how this Ardwick repair was solved.
If you have worked through all of that and Windows still will not load, you have learned something valuable: the hardware is most likely fine and the problem is with the Windows installation or the boot configuration. That is good news, because those are usually quick and affordable to put right.
Why a Windows reinstall can leave you stuck in BIOS
A reinstall going wrong is one of the most common ways to end up exactly where this gaming PC did. There are a few traps that catch people, and it is worth understanding them because they explain a lot of "it was working, then I reinstalled and now it boots to BIOS" stories.
The most common is an interrupted or incomplete install. If the process is stopped partway, by a power cut, a removed USB stick, a crash, or simply choosing the wrong options, the boot files can end up missing or half written. The drive is healthy and detected, but there is nothing valid for the firmware to boot, so it drops to the BIOS.
The second trap is a firmware mode mismatch between UEFI and legacy BIOS. Windows can be installed in two different ways, the modern UEFI method (which uses a GPT formatted disk) or the older legacy method (which uses an MBR formatted disk). If Windows was installed one way but the BIOS is later set to boot the other way, the firmware will not recognise the disk as bootable. This is why people often report that their PC will not boot after they disable CSM (the Compatibility Support Module) or switch the board to UEFI only. Microsoft's own guidance on booting to UEFI or legacy BIOS mode explains that once Windows is installed it boots using the same mode it was installed with, so the firmware setting and the install have to match.
If you are in this position with a working install that will not boot in the new mode, you do not always have to wipe and start again. Microsoft provides a built in tool called MBR2GPT that can convert a system disk from MBR to GPT without deleting your data, so it can then boot in UEFI mode. It is easy to get wrong, so if you are not confident with command line tools, hand it to a repairer rather than risk your data. The cleaner long term answer, and the one we chose here, is a proper clean install set up correctly from the start.
How to do a clean Windows 11 install properly
A clean install is not complicated, but doing it properly is what separates a stable machine from one that boots to BIOS or behaves oddly afterwards. Here is the approach we use, and the one we would recommend if you tackle it yourself. Before anything else, back up your files, because a clean install wipes the drive. Microsoft makes the same point on its own installation pages, and we cannot stress it enough. If you are unsure how, read our guide on why backing up your data is critical first.
- Check the machine meets the requirements. Windows 11 needs a 64 bit processor from the supported list, 4GB of RAM (far more in practice for gaming), 64GB of storage, and crucially TPM 2.0 and Secure Boot capability, as set out in the official Windows 11 system requirements. A Ryzen 7 5800X on a B550 board like this one comfortably meets all of them.
- Make the installation media. Download the official tool from Microsoft and create a bootable USB stick (8GB or larger). Microsoft's create installation media page walks through this. Use the official source, not a random download, so you know the files are clean.
- Set the BIOS up for UEFI. Enable TPM (on AMD boards this is often called fTPM) and Secure Boot, set the boot mode to UEFI, and disable CSM/legacy if it is on. This keeps the install modern and consistent so you avoid the mode mismatch described above.
- Boot from the USB and install. Pick the UEFI USB entry in the boot menu, delete the old Windows partitions when prompted (after backing up), and let it install to the clean drive. Do not pull the USB stick out early, and do not interrupt it.
- Finish setup and check it actually boots on its own. Once installed, remove the USB and confirm the PC boots into Windows by itself before you go any further. Then move on to drivers.
If you are weighing up whether the jump is worth it on an older machine, our article on whether you should upgrade to Windows 11 goes into the pros and cons in plain English.
Getting drivers right after a reinstall (the part people skip)
A fresh copy of Windows will run, but it is not finished until the drivers are in. Drivers are the small pieces of software that let Windows talk properly to your hardware. Skip them and you get poor performance, missing features, no sound, stuttering games, or, most frustratingly, no internet. This is exactly the snag this Ardwick PC hit: with no network driver, it could not get online to download anything else, which is why we used a second computer to fetch the drivers first.
The order matters more than people think. Here is the sequence we follow on an AMD machine like this one:
| Order | Driver | Why it goes here |
|---|---|---|
| 1 | Chipset (AMD) | Controls how the processor talks to the motherboard, including USB, PCIe lanes, storage controllers and power management. Install it first so everything else is recognised correctly. |
| 2 | Network (LAN and Wi-Fi) | Gets you online so Windows Update and the other drivers can download. If your fresh install has no internet, this is the one to grab on another PC first. |
| 3 | Graphics (GPU) | The big one for a gaming PC. Install the official AMD or NVIDIA driver for your card to unlock full performance, correct resolutions and refresh rates. |
| 4 | Audio, storage and peripherals | Sound, any extra storage controllers, and devices like printers, capture cards or controllers. Windows Update covers many of these once you are online. |
A practical tip that would have saved this machine a detour: before you wipe anything, download the chipset and network drivers from your motherboard maker's support page (search your exact board model) and the GPU driver from AMD or NVIDIA, and save them to the same USB stick as your Windows installer. Then, even with no internet on the fresh install, you can install the network driver straight away and get online, after which Windows Update and the GPU software pull the latest versions. If you are not certain which board you have, our guide on finding your model number shows the idea (on a desktop the model is usually printed on the board itself).
Diagnosing versus guessing: why method beats swapping parts
This repair is a good reminder of two things. First, a comprehensive diagnosis, testing the hardware before assuming the worst, prevents expensive guesswork. Second, simply asking the client the right questions revealed the real cause in moments. Good repair is as much about methodical thinking and communication as technical skill, and it is how a scary-looking fault turned out to be a straightforward fix.
It is worth spelling out the difference, because it is where a lot of money gets wasted. Guessing means swapping in parts until something works: a new SSD, then maybe new RAM, then a new motherboard, each one a cost and none of them actually identified as the problem. With a symptom like booting to BIOS, parts swapping can easily run up a big bill and still not fix anything, because the fault was never in the hardware at all. Diagnosing means working from the symptom backwards: a working BIOS screen tells you the core hardware is alive, a healthy detected drive rules out the disk, and a recent reinstall points at software. Each test removes a whole category of possible causes. By the time you act, you are fixing the actual problem, not buying parts on a hunch.
The single most useful diagnostic tool is often a question: what changed just before it broke? A reinstall, a BIOS update, a new component, a power cut, a knock to the case. The answer narrows things down faster than any benchmark. This is also why we always quote up front rather than open ended: once the cause is known, the work is known. The same disciplined approach is what we apply to random crashes and restarts, which look frightening but usually trace back to a specific, fixable cause.
Common AMD gaming PC faults and how to spot them
Booting to BIOS is just one of a handful of symptoms gaming PCs commonly throw up. Because powerful components run hot and pull a lot of power, the faults tend to cluster around heat, power and connections. Here is a quick reference for telling them apart:
| Symptom | Likely cause | What to check first |
|---|---|---|
| Boots straight to BIOS | Wrong boot order, drive not detected, corrupt or wrong mode Windows install | Boot priority, drive detection, what changed recently |
| Shuts down or restarts under load | Overheating, or a failing or undersized power supply | Temperatures, dust in coolers, PSU age and wattage |
| Stuttering or low frame rates | Dusty cooler, dried out thermal paste, or an outdated graphics driver | Clean the cooling, check temps, reinstall the GPU driver |
| No display, but fans spin | Loose graphics card, monitor cable, or RAM | Reseat the GPU and RAM, try a different cable or port |
| Will not power on or post at all | RAM not seated, power connection, or scrambled BIOS settings | Reseat RAM, check power cables, clear CMOS |
| Loud fans and high temperatures | Dust build up, poor airflow, or failing fan | Clean filters and heatsinks, check fan spin |
None of these means a machine is beyond help, and several are things you can check yourself. If a fault sits with the storage and you are worried about your files, our data recovery service can often retrieve them, and an ageing hard drive is a great excuse to read our guide on why an SSD is worth it.
Keeping an AMD gaming PC healthy: maintenance that prevents faults
A lot of the faults above are preventable. Gaming PCs pull air through the case constantly, and that air carries dust. Over time dust coats the heatsinks and fans, airflow drops, and temperatures climb, which leads to throttling, stuttering, loud fans, and in bad cases shutdowns under load. A little regular care keeps a machine like this Ryzen build fast and quiet for years.
- Clean the dust out regularly. Every six to twelve months, with the PC off and unplugged, blow the dust out of the fans, heatsinks and filters using short bursts of compressed air. Hold the fans still while you do it so they do not spin up and generate a charge. This one habit prevents most heat related problems.
- Keep an eye on temperatures. Free monitoring tools show your CPU and GPU temperatures. As a rough guide, you want both comfortably under the low 80s Celsius during a long gaming session. If they are creeping higher than they used to, dust or tired thermal paste is the usual reason.
- Refresh the thermal paste when needed. The paste between the processor and its cooler dries out over the years and conducts heat less well. Re applying fresh paste can drop temperatures noticeably. Our piece on thermal paste explains when and why it is worth doing.
- Mind the airflow. Keep the case off thick carpet, leave a gap behind it, and make sure intake and exhaust fans are not blocked. Good airflow does more for temperatures than any single expensive part.
- Do not ignore the power supply. A quality PSU with enough headroom is the unsung hero of a stable gaming PC. Random shutdowns under load are often a power supply that is failing or was always a bit too small for the components.
- Keep drivers and Windows current, but sensibly. Up to date graphics drivers fix bugs and add performance, but you do not have to chase every single release. Update when you hit a problem or a new game needs it.
If you are thinking about upgrades while you are in there, more memory is one of the most cost effective ways to help a busy gaming or work machine, as we explain in do I need extra memory. And if you ever consider liquid cooling, read our honest take on the risks of water cooling first.
When to call a professional
Plenty of the checks in this guide are safe to try yourself, and we would always rather you fixed a free five minute problem than paid for it. There are points, though, where handing it over saves you time, money and risk. It is worth getting help when: the drive is not detected at all and you have files on it you cannot lose; you are facing a firmware mode conversion or command line tools you are not comfortable with; a reinstall keeps failing; the machine is unstable under load and you cannot pin down whether it is heat, power or a part; or you simply do not have the time to work through it methodically. There is no shame in it, a clean diagnosis from someone who does this daily is often cheaper than a single wrong part bought on a guess.
Before any repair that might wipe a drive, it is also worth reading our advice on whether to wipe your computer before repair, so you know what to back up and what to expect.
Related reading: if you are building or upgrading a gaming rig, see our guide on building a new PC, and repair versus replace for when a fix beats a new machine.
How Manchester PC can help
If your PC boots to BIOS, will not load Windows, or has trouble after a reinstall, we can diagnose and fix it. We test the hardware, sort the Windows installation and drivers, and confirm a stable result. We quote up front.
We cover Manchester and the surrounding areas with free local collection and return, fair pricing and honest advice, we will always tell you when a repair is not worth it rather than push one. For a gaming PC repair in Ardwick or Manchester, an AMD computer repair, or any computer repair, get a free, no-obligation quote or call us on 0161 820 1992.